Articles
Getting Mender OTA Working on Zephyr
Getting Mender OTA working with Zephyr and MCUboot, from device authentication and TLS problems to A/B firmware updates and rollback.
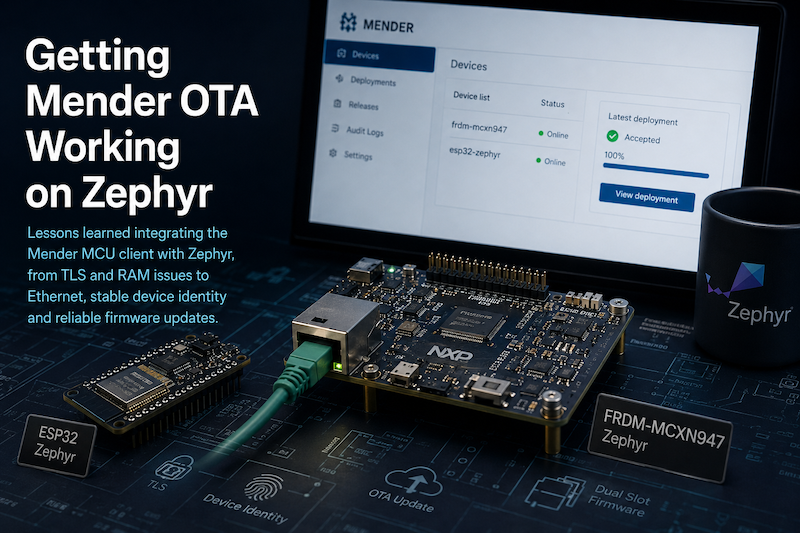
Mender OTA Updates are something I have mainly used with embedded Linux systems, normally with Yocto and an A/B root filesystem. However, Mender also has an MCU client, which made me curious about what it would take to use it with Zephyr.
The aim was to get beyond simply connecting a Zephyr device to a Mender server. I wanted to be able to deploy an update from Mender, download it onto the target, install it into an inactive firmware slot, reboot into the new image and retain the ability to roll back if the new firmware did not work.
This article describes the process of getting that working, including some of the (many!) things that did not work along the way.
Starting With an ESP32
Like most embedded engineers, I have a random selection of boards lying around my office. So, my first target was an ESP32 running Zephyr. I already had a working Wi-Fi example for this board, so it provided a convenient starting point for understanding how the Mender MCU client fitted into Zephyr.
The initial aim was just to authenticate the board with the Mender server. Before looking at firmware updates, I needed the basic pieces working:
- Wi-Fi networking
- DNS
- TLS
- a stable device identity
- persistent Mender authentication keys
- Mender client authentication
The first problems were around integrating the Mender MCU client into
the Zephyr build. The Mender and cJSON sources were already available
locally, but Zephyr did not automatically know that they were modules.
Until they were correctly added to ZEPHYR_EXTRA_MODULES, the relevant
CONFIG_MENDER_* and cJSON Kconfig symbols did not exist.
The CA certificate also needed to be included in the application. This
was added to the build using generate_inc_file_for_target() so that
the DER certificate could be registered with Zephyr’s TLS subsystem.
Initially I also tried to expose more of the Mender authentication process from the application itself. This was useful for understanding what was happening, but it duplicated functionality already provided by the Mender client and increased both the code size and memory requirements.
I eventually simplified this so that the application logged the useful stages, such as network setup, certificate registration and key handling, while leaving the actual authentication exchange to the Mender client.
TLS Problems
The next issue was with mbedTLS.
The first failure was in the PSA-backed private-key path. The configuration that worked was to keep:
CONFIG_MBEDTLS_PSA_CRYPTO_C=ybut disable:
CONFIG_MBEDTLS_USE_PSA_CRYPTOThis allowed key generation to work while avoiding the problematic PSA-backed PK export path on the Zephyr 4.2/ESP32 combination I was using.
Entropy configuration also caused problems and had to be made explicit before TLS would work reliably.
At this point I was still only trying to authenticate a device. There was no firmware update involved yet, but the exercise was already showing how many other parts of the system an OTA client depends on.
Running Out of RAM
The ESP32 then ran into memory problems.
There were several significant users of RAM:
- the Mender heap
- the Mender workqueue stack
- Zephyr network buffers
- TLS
- application and system thread stacks
I reduced the network pools for the relatively simple workload and removed deployment logging that was not required for an authentication-only test. I also initially configured Mender to share Zephyr’s existing heap and workqueue rather than allocating separate ones.
This got the image to build, but the resulting firmware then crashed very early during startup with a fatal CPU exception and an invalid stack pointer.
There was also a large amount of kernel mutex debug logging being produced before the application reached its own startup messages. Reducing the global log level from debug to info helped with the very tight configuration.
By this stage the ESP32 had been useful for learning how the Mender client fitted into Zephyr, but I came to the conclusion the ESP32, Mender and me were just not going to get along.
Moving to the FRDM-MCXN947
I had recently obtained a FRDM-MCXN947 for another project and that had more headroom, so it was time to switch boards…
The FRDM-MCXN947 version used Ethernet rather than Wi-Fi, so I had to make some changes.
One of the first things that needed changing was the MAC address configuration. The board configuration was using:
zephyr,random-mac-addressI was using the MAC address as the Mender device identity, so a random MAC was not suitable. The identity needs to remain the same across reboots, otherwise Mender has no idea that this was the same board as before.
The board overlay was changed to remove the random MAC address and use NXP’s unique MAC support instead.
This gave the application a stable Ethernet MAC address that could also be used as the Mender identity.
Getting Ethernet Working
The first Ethernet configuration was wrong.
I initially tried configuration symbols for the older NXP ENET driver before establishing that the MCXN947 board was using the ENET QOS driver.
The relevant configuration became:
CONFIG_ETH_NXP_ENET_QOS=y
CONFIG_ETH_NXP_ENET_QOS_MAC=y
CONFIG_NET_BUF_FIXED_DATA_SIZE=y
Once the correct driver was enabled, the application built, but Ethernet was still not working correctly. The driver reported errors including:
No new RX buf availablealong with receive descriptor errors.
This turned out to be buffer starvation rather than anything related to Mender. Some of the networking values had been reduced quite aggressively while trying to fit the earlier ESP32 version into RAM, and those values were not appropriate for the ENET QOS controller.
I increased the receive buffers and adjusted the fragment and DMA descriptor configuration.
Waiting for the Ethernet Link
DNS resolution then failed intermittently with EAI_CANCELED.
Looking at the order of the log messages showed that the application was trying to use DNS before the PHY had actually reported that the Ethernet link was up.
Checking net_if_is_carrier_ok() on its own was not sufficient for the
startup sequence on this board.
I changed the application to wait for the real Ethernet link before continuing with the IP and DNS configuration. DNS was also changed to retry transient resolver errors rather than immediately treating them as fatal.
With this in place, the board could finally:
- bring up Ethernet
- configure its IP address
- resolve the Mender server
- register the CA certificate
- select a stable MAC-based identity
- load or generate its authentication key
- authenticate with Mender
- activate the Mender client
The logs now showed:
Mender authentication acceptedThis was the first major milestone on the MCXN947, it could talk to the Mender server and finally authenticate.
Creating a Mender Artifact
The next step was to create a Mender artifact containing the Zephyr firmware.
I added a script to package the firmware, assigned the device type
frdm-mcxn947, and generated an artifact containing the normal
zephyr.bin.
Mender accepted the artifact and it could be uploaded to the server.
However, this exposed an important difference between creating a Mender artifact and actually having an OTA update system.
At this stage I discovered I had not created a mechanism for installing the firmware. There was no second firmware slot managed by a bootloader and the application was not using Mender’s Zephyr image update module.
The artifact was valid, but the board could not use it to perform an OTA update.
To do that, the boot architecture needed to change.
Adding MCUboot
I changed the project to use MCUboot and Zephyr sysbuild.
The resulting update path was:
%3btext-align:center%3b%7d%23mermaid-0 .edgeLabel p%7bbackground-color:rgba(232%2c232%2c232%2c 0.8)%3b%7d%23mermaid-0 .edgeLabel rect%7bopacity:0.5%3bbackground-color:rgba(232%2c232%2c232%2c 0.8)%3bfill:rgba(232%2c232%2c232%2c 0.8)%3b%7d%23mermaid-0 .labelBkg%7bbackground-color:rgba(232%2c 232%2c 232%2c 0.5)%3b%7d%23mermaid-0 .cluster rect%7bfill:%23ffffde%3bstroke:%23aaaa33%3bstroke-width:1px%3b%7d%23mermaid-0 .cluster text%7bfill:%23333%3b%7d%23mermaid-0 .cluster span%7bcolor:%23333%3b%7d%23mermaid-0 .node .collapsed-indicator%7bfill:%23aaaa33%3bstroke:none%3bopacity:0.6%3b%7d%23mermaid-0 .node .collapsed-separator%7bstroke:%23aaaa33%3bstroke-width:0.75px%3b%7d%23mermaid-0 div.mermaidTooltip%7bposition:absolute%3btext-align:center%3bmax-width:200px%3bpadding:2px%3bfont-family:arial%2csans-serif%3bfont-size:12px%3bbackground:hsl(80%2c 100%25%2c 96.2745098039%25)%3bborder:1px solid %23aaaa33%3bborder-radius:2px%3bpointer-events:none%3bz-index:100%3b%7d%23mermaid-0 .flowchartTitleText%7btext-anchor:middle%3bfont-size:18px%3bfill:%23333%3b%7d%23mermaid-0 rect.text%7bfill:none%3bstroke-width:0%3b%7d%23mermaid-0 .icon-shape%2c%23mermaid-0 .image-shape%7bbackground-color:rgba(232%2c232%2c232%2c 0.8)%3btext-align:center%3b%7d%23mermaid-0 .icon-shape p%2c%23mermaid-0 .image-shape p%7bbackground-color:rgba(232%2c232%2c232%2c 0.8)%3bpadding:2px%3b%7d%23mermaid-0 .icon-shape .label rect%2c%23mermaid-0 .image-shape .label rect%7bopacity:0.5%3bbackground-color:rgba(232%2c232%2c232%2c 0.8)%3bfill:rgba(232%2c232%2c232%2c 0.8)%3b%7d%23mermaid-0 .label-icon%7bdisplay:inline-block%3bheight:1em%3boverflow:visible%3bvertical-align:-0.125em%3b%7d%23mermaid-0 .node .label-icon path%7bfill:currentColor%3bstroke:revert%3bstroke-width:revert%3b%7d%23mermaid-0 .node .neo-node%7bstroke:%239370DB%3b%7d%23mermaid-0 %5bdata-look='neo'%5d.node rect%2c%23mermaid-0 %5bdata-look='neo'%5d.cluster rect%2c%23mermaid-0 %5bdata-look='neo'%5d.node polygon%7bstroke:%239370DB%3bfilter:drop-shadow(1px 2px 2px rgba(185%2c 185%2c 185%2c 1))%3b%7d%23mermaid-0 %5bdata-look='neo'%5d.swimlane.cluster rect%7bfilter:none%3b%7d%23mermaid-0 %5bdata-look='neo'%5d.node path%7bstroke:%239370DB%3bstroke-width:1px%3b%7d%23mermaid-0 %5bdata-look='neo'%5d.node .outer-path%7bfilter:drop-shadow(1px 2px 2px rgba(185%2c 185%2c 185%2c 1))%3b%7d%23mermaid-0 %5bdata-look='neo'%5d.node .neo-line path%7bstroke:%239370DB%3bfilter:none%3b%7d%23mermaid-0 %5bdata-look='neo'%5d.node circle%7bstroke:%239370DB%3bfilter:drop-shadow(1px 2px 2px rgba(185%2c 185%2c 185%2c 1))%3b%7d%23mermaid-0 %5bdata-look='neo'%5d.node circle .state-start%7bfill:black%3b%7d%23mermaid-0 %5bdata-look='neo'%5d.icon-shape .icon%7bfill:%239370DB%3bfilter:drop-shadow(1px 2px 2px rgba(185%2c 185%2c 185%2c 1))%3b%7d%23mermaid-0 %5bdata-look='neo'%5d.icon-shape .icon-neo path%7bstroke:%239370DB%3bfilter:drop-shadow(1px 2px 2px rgba(185%2c 185%2c 185%2c 1))%3b%7d%23mermaid-0 :root%7b--mermaid-font-family:arial%2csans-serif%3b%7d%3c/style%3e%3cg%3e%3cmarker id='mermaid-0_flowchart-v2-pointEnd' class='marker flowchart-v2' viewBox='0 0 10 10' refX='5' refY='5' markerUnits='userSpaceOnUse' markerWidth='8' markerHeight='8' orient='auto'%3e%3cpath d='M 0 0 L 10 5 L 0 10 z' class='arrowMarkerPath' style='stroke-width: 1%3b stroke-dasharray: 1%2c 0%3b'/%3e%3c/marker%3e%3cmarker id='mermaid-0_flowchart-v2-pointStart' class='marker flowchart-v2' viewBox='0 0 10 10' refX='4.5' refY='5' markerUnits='userSpaceOnUse' markerWidth='8' markerHeight='8' orient='auto'%3e%3cpath d='M 0 5 L 10 10 L 10 0 z' class='arrowMarkerPath' style='stroke-width: 1%3b stroke-dasharray: 1%2c 0%3b'/%3e%3c/marker%3e%3cmarker id='mermaid-0_flowchart-v2-pointEnd-margin' class='marker flowchart-v2' viewBox='0 0 11.5 14' refX='11.5' refY='7' markerUnits='userSpaceOnUse' markerWidth='10.5' markerHeight='14' orient='auto'%3e%3cpath d='M 0 0 L 11.5 7 L 0 14 z' class='arrowMarkerPath' style='stroke-width: 0%3b stroke-dasharray: 1%2c 0%3b'/%3e%3c/marker%3e%3cmarker id='mermaid-0_flowchart-v2-pointStart-margin' class='marker flowchart-v2' viewBox='0 0 11.5 14' refX='1' refY='7' markerUnits='userSpaceOnUse' markerWidth='11.5' markerHeight='14' orient='auto'%3e%3cpolygon points='0%2c7 11.5%2c14 11.5%2c0' class='arrowMarkerPath' style='stroke-width: 0%3b stroke-dasharray: 1%2c 0%3b'/%3e%3c/marker%3e%3cmarker id='mermaid-0_flowchart-v2-circleEnd' class='marker flowchart-v2' viewBox='0 0 10 10' refX='11' refY='5' markerUnits='userSpaceOnUse' markerWidth='11' markerHeight='11' orient='auto'%3e%3ccircle cx='5' cy='5' r='5' class='arrowMarkerPath' style='stroke-width: 1%3b stroke-dasharray: 1%2c 0%3b'/%3e%3c/marker%3e%3cmarker id='mermaid-0_flowchart-v2-circleStart' class='marker flowchart-v2' viewBox='0 0 10 10' refX='-1' refY='5' markerUnits='userSpaceOnUse' markerWidth='11' markerHeight='11' orient='auto'%3e%3ccircle cx='5' cy='5' r='5' class='arrowMarkerPath' style='stroke-width: 1%3b stroke-dasharray: 1%2c 0%3b'/%3e%3c/marker%3e%3cmarker id='mermaid-0_flowchart-v2-circleEnd-margin' class='marker flowchart-v2' viewBox='0 0 10 10' refY='5' refX='12.25' markerUnits='userSpaceOnUse' markerWidth='14' markerHeight='14' orient='auto'%3e%3ccircle cx='5' cy='5' r='5' class='arrowMarkerPath' style='stroke-width: 0%3b stroke-dasharray: 1%2c 0%3b'/%3e%3c/marker%3e%3cmarker id='mermaid-0_flowchart-v2-circleStart-margin' class='marker flowchart-v2' viewBox='0 0 10 10' refX='-2' refY='5' markerUnits='userSpaceOnUse' markerWidth='14' markerHeight='14' orient='auto'%3e%3ccircle cx='5' cy='5' r='5' class='arrowMarkerPath' style='stroke-width: 0%3b stroke-dasharray: 1%2c 0%3b'/%3e%3c/marker%3e%3cmarker id='mermaid-0_flowchart-v2-crossEnd' class='marker cross flowchart-v2' viewBox='0 0 11 11' refX='12' refY='5.2' markerUnits='userSpaceOnUse' markerWidth='11' markerHeight='11' orient='auto'%3e%3cpath d='M 1%2c1 l 9%2c9 M 10%2c1 l -9%2c9' class='arrowMarkerPath' style='stroke-width: 2%3b stroke-dasharray: 1%2c 0%3b'/%3e%3c/marker%3e%3cmarker id='mermaid-0_flowchart-v2-crossStart' class='marker cross flowchart-v2' viewBox='0 0 11 11' refX='-1' refY='5.2' markerUnits='userSpaceOnUse' markerWidth='11' markerHeight='11' orient='auto'%3e%3cpath d='M 1%2c1 l 9%2c9 M 10%2c1 l -9%2c9' class='arrowMarkerPath' style='stroke-width: 2%3b stroke-dasharray: 1%2c 0%3b'/%3e%3c/marker%3e%3cmarker id='mermaid-0_flowchart-v2-crossEnd-margin' class='marker cross flowchart-v2' viewBox='0 0 15 15' refX='17.7' refY='7.5' markerUnits='userSpaceOnUse' markerWidth='12' markerHeight='12' orient='auto'%3e%3cpath d='M 1%2c1 L 14%2c14 M 1%2c14 L 14%2c1' class='arrowMarkerPath' style='stroke-width: 2.5%3b'/%3e%3c/marker%3e%3cmarker id='mermaid-0_flowchart-v2-crossStart-margin' class='marker cross flowchart-v2' viewBox='0 0 15 15' refX='-3.5' refY='7.5' markerUnits='userSpaceOnUse' markerWidth='12' markerHeight='12' orient='auto'%3e%3cpath d='M 1%2c1 L 14%2c14 M 1%2c14 L 14%2c1' class='arrowMarkerPath' style='stroke-width: 2.5%3b stroke-dasharray: 1%2c 0%3b'/%3e%3c/marker%3e%3cg class='root'%3e%3cg class='clusters'/%3e%3cg class='edgePaths'%3e%3cpath d='M138%2c62L138%2c66.167C138%2c70.333%2c138%2c78.667%2c138%2c86.333C138%2c94%2c138%2c101%2c138%2c104.5L138%2c108' id='mermaid-0-L_server_client_0' class='edge-thickness-normal edge-pattern-solid edge-thickness-normal edge-pattern-solid flowchart-link' style='%3b' data-edge='true' data-et='edge' data-id='L_server_client_0' data-points='W3sieCI6MTM4LCJ5Ijo2Mn0seyJ4IjoxMzgsInkiOjg3fSx7IngiOjEzOCwieSI6MTEyfV0=' data-look='classic' marker-end='url(%23mermaid-0_flowchart-v2-pointEnd)'/%3e%3cpath d='M138%2c166L138%2c170.167C138%2c174.333%2c138%2c182.667%2c138%2c190.333C138%2c198%2c138%2c205%2c138%2c208.5L138%2c212' id='mermaid-0-L_client_module_0' class='edge-thickness-normal edge-pattern-solid edge-thickness-normal edge-pattern-solid flowchart-link' style='%3b' data-edge='true' data-et='edge' data-id='L_client_module_0' data-points='W3sieCI6MTM4LCJ5IjoxNjZ9LHsieCI6MTM4LCJ5IjoxOTF9LHsieCI6MTM4LCJ5IjoyMTZ9XQ==' data-look='classic' marker-end='url(%23mermaid-0_flowchart-v2-pointEnd)'/%3e%3cpath d='M138%2c294L138%2c298.167C138%2c302.333%2c138%2c310.667%2c138%2c318.333C138%2c326%2c138%2c333%2c138%2c336.5L138%2c340' id='mermaid-0-L_module_slot_0' class='edge-thickness-normal edge-pattern-solid edge-thickness-normal edge-pattern-solid flowchart-link' style='%3b' data-edge='true' data-et='edge' data-id='L_module_slot_0' data-points='W3sieCI6MTM4LCJ5IjoyOTR9LHsieCI6MTM4LCJ5IjozMTl9LHsieCI6MTM4LCJ5IjozNDR9XQ==' data-look='classic' marker-end='url(%23mermaid-0_flowchart-v2-pointEnd)'/%3e%3cpath d='M138%2c398L138%2c402.167C138%2c406.333%2c138%2c414.667%2c138%2c422.333C138%2c430%2c138%2c437%2c138%2c440.5L138%2c444' id='mermaid-0-L_slot_reboot_0' class='edge-thickness-normal edge-pattern-solid edge-thickness-normal edge-pattern-solid flowchart-link' style='%3b' data-edge='true' data-et='edge' data-id='L_slot_reboot_0' data-points='W3sieCI6MTM4LCJ5IjozOTh9LHsieCI6MTM4LCJ5Ijo0MjN9LHsieCI6MTM4LCJ5Ijo0NDh9XQ==' data-look='classic' marker-end='url(%23mermaid-0_flowchart-v2-pointEnd)'/%3e%3cpath d='M138%2c502L138%2c506.167C138%2c510.333%2c138%2c518.667%2c138%2c526.333C138%2c534%2c138%2c541%2c138%2c544.5L138%2c548' id='mermaid-0-L_reboot_MCUboot_0' class='edge-thickness-normal edge-pattern-solid edge-thickness-normal edge-pattern-solid flowchart-link' style='%3b' data-edge='true' data-et='edge' data-id='L_reboot_MCUboot_0' data-points='W3sieCI6MTM4LCJ5Ijo1MDJ9LHsieCI6MTM4LCJ5Ijo1Mjd9LHsieCI6MTM4LCJ5Ijo1NTJ9XQ==' data-look='classic' marker-end='url(%23mermaid-0_flowchart-v2-pointEnd)'/%3e%3cpath d='M138%2c606L138%2c610.167C138%2c614.333%2c138%2c622.667%2c138%2c630.333C138%2c638%2c138%2c645%2c138%2c648.5L138%2c652' id='mermaid-0-L_MCUboot_image_0' class='edge-thickness-normal edge-pattern-solid edge-thickness-normal edge-pattern-solid flowchart-link' style='%3b' data-edge='true' data-et='edge' data-id='L_MCUboot_image_0' data-points='W3sieCI6MTM4LCJ5Ijo2MDZ9LHsieCI6MTM4LCJ5Ijo2MzF9LHsieCI6MTM4LCJ5Ijo2NTZ9XQ==' data-look='classic' marker-end='url(%23mermaid-0_flowchart-v2-pointEnd)'/%3e%3c/g%3e%3cg class='edgeLabels'%3e%3cg class='edgeLabel'%3e%3cg class='label' data-id='L_server_client_0' transform='translate(0%2c 0)'%3e%3cforeignObject width='0' height='0'%3e%3cdiv xmlns='http://www.w3.org/1999/xhtml' class='labelBkg' style='display: table-cell%3b white-space: nowrap%3b line-height: 1.5%3b max-width: 200px%3b text-align: center%3b'%3e%3cspan class='edgeLabel'%3e%3c/span%3e%3c/div%3e%3c/foreignObject%3e%3c/g%3e%3c/g%3e%3cg class='edgeLabel'%3e%3cg class='label' data-id='L_client_module_0' transform='translate(0%2c 0)'%3e%3cforeignObject width='0' height='0'%3e%3cdiv xmlns='http://www.w3.org/1999/xhtml' class='labelBkg' style='display: table-cell%3b white-space: nowrap%3b line-height: 1.5%3b max-width: 200px%3b text-align: center%3b'%3e%3cspan class='edgeLabel'%3e%3c/span%3e%3c/div%3e%3c/foreignObject%3e%3c/g%3e%3c/g%3e%3cg class='edgeLabel'%3e%3cg class='label' data-id='L_module_slot_0' transform='translate(0%2c 0)'%3e%3cforeignObject width='0' height='0'%3e%3cdiv xmlns='http://www.w3.org/1999/xhtml' class='labelBkg' style='display: table-cell%3b white-space: nowrap%3b line-height: 1.5%3b max-width: 200px%3b text-align: center%3b'%3e%3cspan class='edgeLabel'%3e%3c/span%3e%3c/div%3e%3c/foreignObject%3e%3c/g%3e%3c/g%3e%3cg class='edgeLabel'%3e%3cg class='label' data-id='L_slot_reboot_0' transform='translate(0%2c 0)'%3e%3cforeignObject width='0' height='0'%3e%3cdiv xmlns='http://www.w3.org/1999/xhtml' class='labelBkg' style='display: table-cell%3b white-space: nowrap%3b line-height: 1.5%3b max-width: 200px%3b text-align: center%3b'%3e%3cspan class='edgeLabel'%3e%3c/span%3e%3c/div%3e%3c/foreignObject%3e%3c/g%3e%3c/g%3e%3cg class='edgeLabel'%3e%3cg class='label' data-id='L_reboot_MCUboot_0' transform='translate(0%2c 0)'%3e%3cforeignObject width='0' height='0'%3e%3cdiv xmlns='http://www.w3.org/1999/xhtml' class='labelBkg' style='display: table-cell%3b white-space: nowrap%3b line-height: 1.5%3b max-width: 200px%3b text-align: center%3b'%3e%3cspan class='edgeLabel'%3e%3c/span%3e%3c/div%3e%3c/foreignObject%3e%3c/g%3e%3c/g%3e%3cg class='edgeLabel'%3e%3cg class='label' data-id='L_MCUboot_image_0' transform='translate(0%2c 0)'%3e%3cforeignObject width='0' height='0'%3e%3cdiv xmlns='http://www.w3.org/1999/xhtml' class='labelBkg' style='display: table-cell%3b white-space: nowrap%3b line-height: 1.5%3b max-width: 200px%3b text-align: center%3b'%3e%3cspan class='edgeLabel'%3e%3c/span%3e%3c/div%3e%3c/foreignObject%3e%3c/g%3e%3c/g%3e%3c/g%3e%3cg class='nodes'%3e%3cg class='node default' id='mermaid-0-flowchart-server-0' data-look='classic' transform='translate(138%2c 35)'%3e%3crect class='basic label-container' style='' x='-81.578125' y='-27' width='163.15625' height='54'/%3e%3cg class='label' style='' transform='translate(-51.578125%2c -12)'%3e%3crect/%3e%3cforeignObject width='103.15625' height='24'%3e%3cdiv xmlns='http://www.w3.org/1999/xhtml' style='display: table-cell%3b white-space: nowrap%3b line-height: 1.5%3b max-width: 200px%3b text-align: center%3b'%3e%3cspan class='nodeLabel'%3e%3cp%3eMender server%3c/p%3e%3c/span%3e%3c/div%3e%3c/foreignObject%3e%3c/g%3e%3c/g%3e%3cg class='node default' id='mermaid-0-flowchart-client-1' data-look='classic' transform='translate(138%2c 139)'%3e%3crect class='basic label-container' style='' x='-98.46875' y='-27' width='196.9375' height='54'/%3e%3cg class='label' style='' transform='translate(-68.46875%2c -12)'%3e%3crect/%3e%3cforeignObject width='136.9375' height='24'%3e%3cdiv xmlns='http://www.w3.org/1999/xhtml' style='display: table-cell%3b white-space: nowrap%3b line-height: 1.5%3b max-width: 200px%3b text-align: center%3b'%3e%3cspan class='nodeLabel'%3e%3cp%3eMender MCU client%3c/p%3e%3c/span%3e%3c/div%3e%3c/foreignObject%3e%3c/g%3e%3c/g%3e%3cg class='node default' id='mermaid-0-flowchart-module-2' data-look='classic' transform='translate(138%2c 255)'%3e%3crect class='basic label-container' style='' x='-130' y='-39' width='260' height='78'/%3e%3cg class='label' style='' transform='translate(-100%2c -24)'%3e%3crect/%3e%3cforeignObject width='200' height='48'%3e%3cdiv xmlns='http://www.w3.org/1999/xhtml' style='display: table%3b white-space: break-spaces%3b line-height: 1.5%3b max-width: 200px%3b text-align: center%3b width: 200px%3b'%3e%3cspan class='nodeLabel'%3e%3cp%3ezephyr-image update module%3c/p%3e%3c/span%3e%3c/div%3e%3c/foreignObject%3e%3c/g%3e%3c/g%3e%3cg class='node default' id='mermaid-0-flowchart-slot-3' data-look='classic' transform='translate(138%2c 371)'%3e%3crect class='basic label-container' style='' x='-117.59375' y='-27' width='235.1875' height='54'/%3e%3cg class='label' style='' transform='translate(-87.59375%2c -12)'%3e%3crect/%3e%3cforeignObject width='175.1875' height='24'%3e%3cdiv xmlns='http://www.w3.org/1999/xhtml' style='display: table-cell%3b white-space: nowrap%3b line-height: 1.5%3b max-width: 200px%3b text-align: center%3b'%3e%3cspan class='nodeLabel'%3e%3cp%3eMCUboot secondary slot%3c/p%3e%3c/span%3e%3c/div%3e%3c/foreignObject%3e%3c/g%3e%3c/g%3e%3cg class='node default' id='mermaid-0-flowchart-reboot-4' data-look='classic' transform='translate(138%2c 475)'%3e%3crect class='basic label-container' style='' x='-52.6875' y='-27' width='105.375' height='54'/%3e%3cg class='label' style='' transform='translate(-22.6875%2c -12)'%3e%3crect/%3e%3cforeignObject width='45.375' height='24'%3e%3cdiv xmlns='http://www.w3.org/1999/xhtml' style='display: table-cell%3b white-space: nowrap%3b line-height: 1.5%3b max-width: 200px%3b text-align: center%3b'%3e%3cspan class='nodeLabel'%3e%3cp%3ereboot%3c/p%3e%3c/span%3e%3c/div%3e%3c/foreignObject%3e%3c/g%3e%3c/g%3e%3cg class='node default' id='mermaid-0-flowchart-MCUboot-5' data-look='classic' transform='translate(138%2c 579)'%3e%3crect class='basic label-container' style='' x='-63.7890625' y='-27' width='127.578125' height='54'/%3e%3cg class='label' style='' transform='translate(-33.7890625%2c -12)'%3e%3crect/%3e%3cforeignObject width='67.578125' height='24'%3e%3cdiv xmlns='http://www.w3.org/1999/xhtml' style='display: table-cell%3b white-space: nowrap%3b line-height: 1.5%3b max-width: 200px%3b text-align: center%3b'%3e%3cspan class='nodeLabel'%3e%3cp%3eMCUboot%3c/p%3e%3c/span%3e%3c/div%3e%3c/foreignObject%3e%3c/g%3e%3c/g%3e%3cg class='node default' id='mermaid-0-flowchart-image-6' data-look='classic' transform='translate(138%2c 683)'%3e%3crect class='basic label-container' style='' x='-95.8125' y='-27' width='191.625' height='54'/%3e%3cg class='label' style='' transform='translate(-65.8125%2c -12)'%3e%3crect/%3e%3cforeignObject width='131.625' height='24'%3e%3cdiv xmlns='http://www.w3.org/1999/xhtml' style='display: table-cell%3b white-space: nowrap%3b line-height: 1.5%3b max-width: 200px%3b text-align: center%3b'%3e%3cspan class='nodeLabel'%3e%3cp%3enew Zephyr image%3c/p%3e%3c/span%3e%3c/div%3e%3c/foreignObject%3e%3c/g%3e%3c/g%3e%3c/g%3e%3c/g%3e%3c/g%3e%3cdefs%3e%3cfilter id='mermaid-0-drop-shadow' height='130%25' width='130%25'%3e%3cfeDropShadow dx='4' dy='4' stdDeviation='0' flood-opacity='0.06' flood-color='black'/%3e%3c/filter%3e%3c/defs%3e%3cdefs%3e%3cfilter id='mermaid-0-drop-shadow-small' height='150%25' width='150%25'%3e%3cfeDropShadow dx='2' dy='2' stdDeviation='0' flood-opacity='0.06' flood-color='black'/%3e%3c/filter%3e%3c/defs%3e%3c/svg%3e)
The Mender zephyr-image update module writes the new firmware into the
inactive MCUboot slot and then requests a test upgrade.
The artifact also changed. Instead of packaging:
zephyr.binit now contained:
zephyr.signed.binwith a Mender payload type of:
zephyr-imageThis gave Mender an update payload that the Zephyr update module actually knew how to install.
Moving to Sysbuild
Using MCUboot meant that the bootloader and application needed to be built together, so the project moved to Zephyr’s sysbuild infrastructure.
This exposed several assumptions in the build scripts.
The artifact creation script originally expected the application configuration under:
build/zephyr/With sysbuild, the application is a sub-build and the directory structure is different. The script had to be updated to understand both layouts and to prefer the MCUboot/sysbuild build when it was available.
I also initially tried using a custom MCUboot signing key. This
introduced problems with the key path in sysbuild.conf and MCUboot’s
public-key build requirements. For this demonstration there was no
benefit in spending more time on the custom key, so I went back to
MCUboot’s default signing key while getting the update path working.
An Invalid Primary Image
One particularly useful failure happened after MCUboot had been enabled.
I built and flashed the application using a normal application-only
west build. MCUboot started, but reported:
Image in the primary slot is not valid!
Unable to find bootable image
The problem was that once MCUboot controlled the boot process, the application could no longer be built and flashed as though MCUboot was not present.
The baseline image needed to be produced using the same MCUboot/sysbuild configuration as the OTA images.
The project now explicitly rejected a plain non-sysbuild application build when MCUboot is enabled. This avoids producing an image that compiles successfully but cannot be booted by the configured bootloader.
After flashing a complete sysbuild-generated baseline, MCUboot could boot the application and the Mender client could authenticate and start polling for deployments.
Memory Problems Again
Once the board started processing real deployments, memory usage became important again.
Looking through the generated configuration and map files showed several large allocations in the main SRAM:
- 64 KiB system heap
- about 36 KiB of network buffer payloads
- about 24 KiB of packet slabs
- about 12 KiB of transmit payloads
- 128 KiB mbedTLS heap
The MCXN947 also had a separate 96 KiB SRAMX bank that the application was not using.
Rather than continuing to reduce everything in the main SRAM, I moved the mbedTLS heap into SRAMX and reduced it from 128 KiB to 64 KiB.
The network pools and general heap were also reduced to values more appropriate for the actual workload, while Ethernet DMA-sensitive data remained in main SRAM.
SHA-384 support was disabled because the certificate chain being used only required P-256/SHA-256.
After these changes, main SRAM usage dropped from approximately 281 KiB to 92 KiB, with the 64 KiB TLS heap moved into SRAMX.
This gave the networking and application stacks considerably more room.
A Stack Overflow During Deployment Polling
The next failure happened when Mender checked for a deployment.
Zephyr reported a stack overflow in:
k_sys_work_qEarlier in the project I had configured Mender to use the shared Zephyr system workqueue to save RAM. That had been adequate for the authentication test, but it was not enough once Mender started doing real deployment work.
I changed Mender back to using its own workqueue:
CONFIG_MENDER_SCHEDULER_SEPARATE_WORK_QUEUE=y
CONFIG_MENDER_SCHEDULER_WORK_QUEUE_STACK_SIZE=6
This is a good example of why reducing every memory setting is not necessarily an optimisation. Saving a few KiB by removing a dedicated stack is not useful if the shared stack then overflows.
With the separate workqueue in place, the deployment progressed further.
The Artifact Was Not Coming From My Mender Host
The board now received a real deployment from Mender and was given a URL from which to download the artifact.
It then failed to resolve:
s3.docker.mender.ioInitially this looked odd because I thought I had configured everything to use my Docker-based self-hosted Mender server. Actually reading the manuals, looking at the docker compose file and a lot of googling later, I had a correct server configuration that I could put into my local DNS server.
The device could now resolve both the local Mender service and the external artifact storage.
Running Out of File Descriptors
The next failure was:
Too many open files in systemBy this stage the application had DNS resolver sockets as well as the connections needed by Mender and TLS. The configured limits were simply too low for the complete workload.
I increased them to:
CONFIG_NET_MAX_CONTEXTS=8
CONFIG_ZVFS_OPEN_MAX=8
This was another problem that only appeared once the whole update path was being exercised.
The Complete OTA Update
With these problems resolved, I was finally able to perform the complete OTA update.
The board booted through MCUboot and started the Zephyr application. The Mender client loaded its persistent authentication key, established a stable device identity, authenticated with the server and was able to poll for deployments.
When an update gets assigned, the board will download the zephyr-image
artifact containing zephyr.signed.bin.
The Mender Zephyr image update module writes the new firmware to
slot1_partition and requests a test upgrade using:
boot_request_upgrade(BOOT_UPGRADE_TEST);The board then reboots.
MCUboot boots the new firmware in test mode. Once the new application has started successfully, the image is confirmed using MCUboot’s image confirmation mechanism.
If the new firmware does not successfully reach the confirmation stage, MCUboot retains the ability to roll back to the previous image.
This was the point at which I considered the experiment successful: the board could receive a deployment from Mender, install it into the inactive slot, boot the new firmware and confirm the update.
Lessons Learnt
Linux is my comfort zone. I understand microprocessor boards. Developing with Zephyr and microcontrollers is new to me, so there was a lot of learning along the way (which was part of the point)
If I was starting again, I would introduce MCUboot at the beginning.
The initial authentication work was useful for understanding the Mender MCU client, but the bootloader and flash layout ultimately determine what an installable firmware image looks like. Adding them later meant changing both the build and artifact format.
I would also establish a stable device identity early. Using the MAC address is convenient, but only if the MAC itself is stable across boots.
Memory layout is another area I would look at much earlier. TLS, networking and OTA all require significant amounts of RAM for an MCU. On the MCXN947, using SRAMX for the mbedTLS heap was much better than trying to force every large allocation into the primary SRAM bank.
Finally, I would test the complete network path rather than just connectivity to the Mender API. Successfully resolving and connecting to the Mender server does not prove that the device can reach the server hosting the artifact.
A Security Caveat
There is still one issue with this demonstration that needs highlighting.
The Zephyr configuration reported that there was no proper entropy device available for the MCXN947 in the version of Zephyr I was using. This meant that the TLS configuration did not have the entropy source I would require for a production system.
This does not stop the demonstration from showing how Mender OTA can work with Zephyr and MCUboot, but it does mean I would not use this exact configuration for a production device without first fixing the entropy source.
OTA is part of the security boundary of a device, so TLS, signing keys and random-number generation need to be treated as production requirements rather than optional improvements.
Source Code
The final project contains the Zephyr application, the FRDM-MCXN947 configuration, the MCUboot/sysbuild setup and the script used to generate the Mender artifacts.
The source is available here:
https://github.com/ming4real/mender-zephyr-demo
The final implementation is reasonably straightforward when viewed as a finished system. Most of the work was in finding all of the assumptions that only became visible as the project progressed from authentication, to artifact creation, and finally to a real OTA update.