Articles
Speeding up Flashing eMMC for the STM32MP1
Improving the time to flash eMMC by replacing STM32CubeProgrammer with snagboot
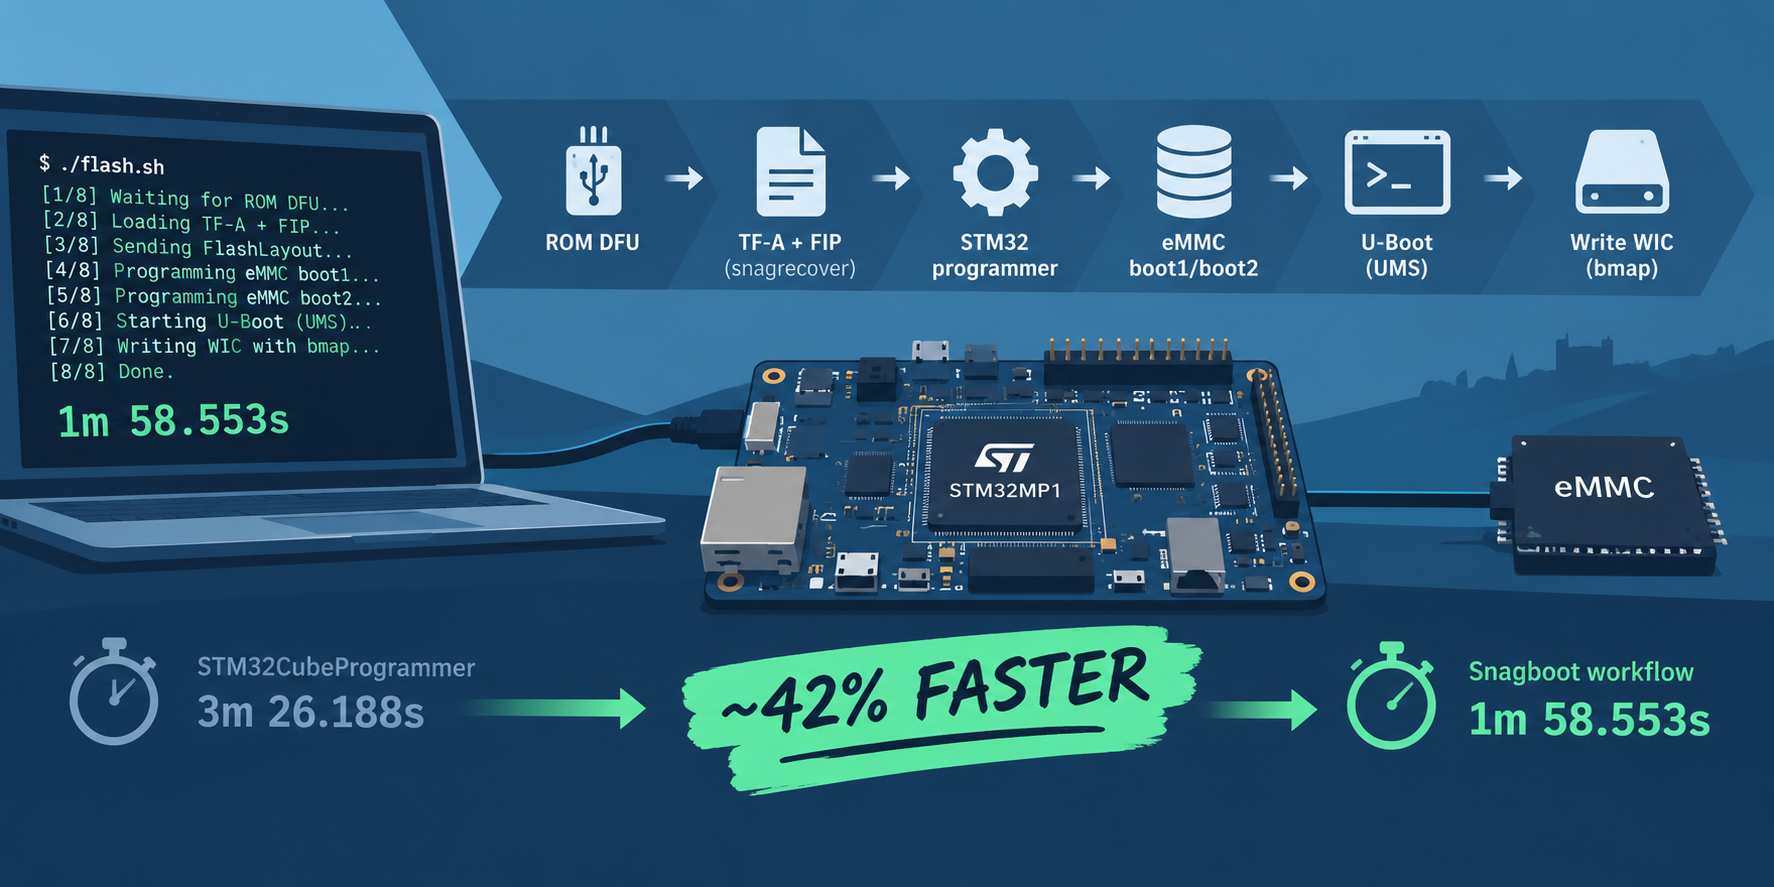
I had an STM32MP157 board with a working flashing process based on STM32CubeProgrammer. It programmed the eMMC correctly, but having got used to the speed of flashing the microSD card with bmaptool and .wic files, I was getting frustrated with how long it was taking to flash the eMMC.
Snagboot looked like a good starting point. It supports recovery and flashing on STM32MP1, including booting a board from its ROM DFU mode.
What STM32CubeProgrammer was doing
The existing process used an ST FlashLayout TSV file describing the images and where they should be programmed.
For an STM32MP1 booting from eMMC, however, “flash the eMMC” does not mean writing one disk image to one block device. There are three areas I needed to program:
- eMMC boot partition 1
- eMMC boot partition 2
- the main eMMC user area
The two boot partitions contain the first-stage boot firmware. The normal partition table, root filesystem and the rest of the system live in the user area.
There was another complication: when the processor starts in USB recovery mode, there isn’t yet enough running on the target to access the eMMC in the way I needed.
What I needed to do was:
%3btext-align:center%3b%7d%23mermaid-0 .edgeLabel p%7bbackground-color:rgba(232%2c232%2c232%2c 0.8)%3b%7d%23mermaid-0 .edgeLabel rect%7bopacity:0.5%3bbackground-color:rgba(232%2c232%2c232%2c 0.8)%3bfill:rgba(232%2c232%2c232%2c 0.8)%3b%7d%23mermaid-0 .labelBkg%7bbackground-color:rgba(232%2c 232%2c 232%2c 0.5)%3b%7d%23mermaid-0 .cluster rect%7bfill:%23ffffde%3bstroke:%23aaaa33%3bstroke-width:1px%3b%7d%23mermaid-0 .cluster text%7bfill:%23333%3b%7d%23mermaid-0 .cluster span%7bcolor:%23333%3b%7d%23mermaid-0 .node .collapsed-indicator%7bfill:%23aaaa33%3bstroke:none%3bopacity:0.6%3b%7d%23mermaid-0 .node .collapsed-separator%7bstroke:%23aaaa33%3bstroke-width:0.75px%3b%7d%23mermaid-0 div.mermaidTooltip%7bposition:absolute%3btext-align:center%3bmax-width:200px%3bpadding:2px%3bfont-family:arial%2csans-serif%3bfont-size:12px%3bbackground:hsl(80%2c 100%25%2c 96.2745098039%25)%3bborder:1px solid %23aaaa33%3bborder-radius:2px%3bpointer-events:none%3bz-index:100%3b%7d%23mermaid-0 .flowchartTitleText%7btext-anchor:middle%3bfont-size:18px%3bfill:%23333%3b%7d%23mermaid-0 rect.text%7bfill:none%3bstroke-width:0%3b%7d%23mermaid-0 .icon-shape%2c%23mermaid-0 .image-shape%7bbackground-color:rgba(232%2c232%2c232%2c 0.8)%3btext-align:center%3b%7d%23mermaid-0 .icon-shape p%2c%23mermaid-0 .image-shape p%7bbackground-color:rgba(232%2c232%2c232%2c 0.8)%3bpadding:2px%3b%7d%23mermaid-0 .icon-shape .label rect%2c%23mermaid-0 .image-shape .label rect%7bopacity:0.5%3bbackground-color:rgba(232%2c232%2c232%2c 0.8)%3bfill:rgba(232%2c232%2c232%2c 0.8)%3b%7d%23mermaid-0 .label-icon%7bdisplay:inline-block%3bheight:1em%3boverflow:visible%3bvertical-align:-0.125em%3b%7d%23mermaid-0 .node .label-icon path%7bfill:currentColor%3bstroke:revert%3bstroke-width:revert%3b%7d%23mermaid-0 .node .neo-node%7bstroke:%239370DB%3b%7d%23mermaid-0 %5bdata-look='neo'%5d.node rect%2c%23mermaid-0 %5bdata-look='neo'%5d.cluster rect%2c%23mermaid-0 %5bdata-look='neo'%5d.node polygon%7bstroke:%239370DB%3bfilter:drop-shadow(1px 2px 2px rgba(185%2c 185%2c 185%2c 1))%3b%7d%23mermaid-0 %5bdata-look='neo'%5d.swimlane.cluster rect%7bfilter:none%3b%7d%23mermaid-0 %5bdata-look='neo'%5d.node path%7bstroke:%239370DB%3bstroke-width:1px%3b%7d%23mermaid-0 %5bdata-look='neo'%5d.node .outer-path%7bfilter:drop-shadow(1px 2px 2px rgba(185%2c 185%2c 185%2c 1))%3b%7d%23mermaid-0 %5bdata-look='neo'%5d.node .neo-line path%7bstroke:%239370DB%3bfilter:none%3b%7d%23mermaid-0 %5bdata-look='neo'%5d.node circle%7bstroke:%239370DB%3bfilter:drop-shadow(1px 2px 2px rgba(185%2c 185%2c 185%2c 1))%3b%7d%23mermaid-0 %5bdata-look='neo'%5d.node circle .state-start%7bfill:black%3b%7d%23mermaid-0 %5bdata-look='neo'%5d.icon-shape .icon%7bfill:%239370DB%3bfilter:drop-shadow(1px 2px 2px rgba(185%2c 185%2c 185%2c 1))%3b%7d%23mermaid-0 %5bdata-look='neo'%5d.icon-shape .icon-neo path%7bstroke:%239370DB%3bfilter:drop-shadow(1px 2px 2px rgba(185%2c 185%2c 185%2c 1))%3b%7d%23mermaid-0 :root%7b--mermaid-font-family:arial%2csans-serif%3b%7d%3c/style%3e%3cg%3e%3cmarker id='mermaid-0_flowchart-v2-pointEnd' class='marker flowchart-v2' viewBox='0 0 10 10' refX='5' refY='5' markerUnits='userSpaceOnUse' markerWidth='8' markerHeight='8' orient='auto'%3e%3cpath d='M 0 0 L 10 5 L 0 10 z' class='arrowMarkerPath' style='stroke-width: 1%3b stroke-dasharray: 1%2c 0%3b'/%3e%3c/marker%3e%3cmarker id='mermaid-0_flowchart-v2-pointStart' class='marker flowchart-v2' viewBox='0 0 10 10' refX='4.5' refY='5' markerUnits='userSpaceOnUse' markerWidth='8' markerHeight='8' orient='auto'%3e%3cpath d='M 0 5 L 10 10 L 10 0 z' class='arrowMarkerPath' style='stroke-width: 1%3b stroke-dasharray: 1%2c 0%3b'/%3e%3c/marker%3e%3cmarker id='mermaid-0_flowchart-v2-pointEnd-margin' class='marker flowchart-v2' viewBox='0 0 11.5 14' refX='11.5' refY='7' markerUnits='userSpaceOnUse' markerWidth='10.5' markerHeight='14' orient='auto'%3e%3cpath d='M 0 0 L 11.5 7 L 0 14 z' class='arrowMarkerPath' style='stroke-width: 0%3b stroke-dasharray: 1%2c 0%3b'/%3e%3c/marker%3e%3cmarker id='mermaid-0_flowchart-v2-pointStart-margin' class='marker flowchart-v2' viewBox='0 0 11.5 14' refX='1' refY='7' markerUnits='userSpaceOnUse' markerWidth='11.5' markerHeight='14' orient='auto'%3e%3cpolygon points='0%2c7 11.5%2c14 11.5%2c0' class='arrowMarkerPath' style='stroke-width: 0%3b stroke-dasharray: 1%2c 0%3b'/%3e%3c/marker%3e%3cmarker id='mermaid-0_flowchart-v2-circleEnd' class='marker flowchart-v2' viewBox='0 0 10 10' refX='11' refY='5' markerUnits='userSpaceOnUse' markerWidth='11' markerHeight='11' orient='auto'%3e%3ccircle cx='5' cy='5' r='5' class='arrowMarkerPath' style='stroke-width: 1%3b stroke-dasharray: 1%2c 0%3b'/%3e%3c/marker%3e%3cmarker id='mermaid-0_flowchart-v2-circleStart' class='marker flowchart-v2' viewBox='0 0 10 10' refX='-1' refY='5' markerUnits='userSpaceOnUse' markerWidth='11' markerHeight='11' orient='auto'%3e%3ccircle cx='5' cy='5' r='5' class='arrowMarkerPath' style='stroke-width: 1%3b stroke-dasharray: 1%2c 0%3b'/%3e%3c/marker%3e%3cmarker id='mermaid-0_flowchart-v2-circleEnd-margin' class='marker flowchart-v2' viewBox='0 0 10 10' refY='5' refX='12.25' markerUnits='userSpaceOnUse' markerWidth='14' markerHeight='14' orient='auto'%3e%3ccircle cx='5' cy='5' r='5' class='arrowMarkerPath' style='stroke-width: 0%3b stroke-dasharray: 1%2c 0%3b'/%3e%3c/marker%3e%3cmarker id='mermaid-0_flowchart-v2-circleStart-margin' class='marker flowchart-v2' viewBox='0 0 10 10' refX='-2' refY='5' markerUnits='userSpaceOnUse' markerWidth='14' markerHeight='14' orient='auto'%3e%3ccircle cx='5' cy='5' r='5' class='arrowMarkerPath' style='stroke-width: 0%3b stroke-dasharray: 1%2c 0%3b'/%3e%3c/marker%3e%3cmarker id='mermaid-0_flowchart-v2-crossEnd' class='marker cross flowchart-v2' viewBox='0 0 11 11' refX='12' refY='5.2' markerUnits='userSpaceOnUse' markerWidth='11' markerHeight='11' orient='auto'%3e%3cpath d='M 1%2c1 l 9%2c9 M 10%2c1 l -9%2c9' class='arrowMarkerPath' style='stroke-width: 2%3b stroke-dasharray: 1%2c 0%3b'/%3e%3c/marker%3e%3cmarker id='mermaid-0_flowchart-v2-crossStart' class='marker cross flowchart-v2' viewBox='0 0 11 11' refX='-1' refY='5.2' markerUnits='userSpaceOnUse' markerWidth='11' markerHeight='11' orient='auto'%3e%3cpath d='M 1%2c1 l 9%2c9 M 10%2c1 l -9%2c9' class='arrowMarkerPath' style='stroke-width: 2%3b stroke-dasharray: 1%2c 0%3b'/%3e%3c/marker%3e%3cmarker id='mermaid-0_flowchart-v2-crossEnd-margin' class='marker cross flowchart-v2' viewBox='0 0 15 15' refX='17.7' refY='7.5' markerUnits='userSpaceOnUse' markerWidth='12' markerHeight='12' orient='auto'%3e%3cpath d='M 1%2c1 L 14%2c14 M 1%2c14 L 14%2c1' class='arrowMarkerPath' style='stroke-width: 2.5%3b'/%3e%3c/marker%3e%3cmarker id='mermaid-0_flowchart-v2-crossStart-margin' class='marker cross flowchart-v2' viewBox='0 0 15 15' refX='-3.5' refY='7.5' markerUnits='userSpaceOnUse' markerWidth='12' markerHeight='12' orient='auto'%3e%3cpath d='M 1%2c1 L 14%2c14 M 1%2c14 L 14%2c1' class='arrowMarkerPath' style='stroke-width: 2.5%3b stroke-dasharray: 1%2c 0%3b'/%3e%3c/marker%3e%3cg class='root'%3e%3cg class='clusters'/%3e%3cg class='edgePaths'%3e%3cpath d='M138%2c62L138%2c66.167C138%2c70.333%2c138%2c78.667%2c138%2c86.333C138%2c94%2c138%2c101%2c138%2c104.5L138%2c108' id='mermaid-0-L_dfu_ftp_0' class='edge-thickness-normal edge-pattern-solid edge-thickness-normal edge-pattern-solid flowchart-link' style='%3b' data-edge='true' data-et='edge' data-id='L_dfu_ftp_0' data-points='W3sieCI6MTM4LCJ5Ijo2Mn0seyJ4IjoxMzgsInkiOjg3fSx7IngiOjEzOCwieSI6MTEyfV0=' data-look='classic' marker-end='url(%23mermaid-0_flowchart-v2-pointEnd)'/%3e%3cpath d='M138%2c166L138%2c170.167C138%2c174.333%2c138%2c182.667%2c138%2c190.333C138%2c198%2c138%2c205%2c138%2c208.5L138%2c212' id='mermaid-0-L_ftp_programmer_0' class='edge-thickness-normal edge-pattern-solid edge-thickness-normal edge-pattern-solid flowchart-link' style='%3b' data-edge='true' data-et='edge' data-id='L_ftp_programmer_0' data-points='W3sieCI6MTM4LCJ5IjoxNjZ9LHsieCI6MTM4LCJ5IjoxOTF9LHsieCI6MTM4LCJ5IjoyMTZ9XQ==' data-look='classic' marker-end='url(%23mermaid-0_flowchart-v2-pointEnd)'/%3e%3cpath d='M138%2c270L138%2c274.167C138%2c278.333%2c138%2c286.667%2c138%2c294.333C138%2c302%2c138%2c309%2c138%2c312.5L138%2c316' id='mermaid-0-L_programmer_layout_0' class='edge-thickness-normal edge-pattern-solid edge-thickness-normal edge-pattern-solid flowchart-link' style='%3b' data-edge='true' data-et='edge' data-id='L_programmer_layout_0' data-points='W3sieCI6MTM4LCJ5IjoyNzB9LHsieCI6MTM4LCJ5IjoyOTV9LHsieCI6MTM4LCJ5IjozMjB9XQ==' data-look='classic' marker-end='url(%23mermaid-0_flowchart-v2-pointEnd)'/%3e%3cpath d='M138%2c374L138%2c378.167C138%2c382.333%2c138%2c390.667%2c138%2c398.333C138%2c406%2c138%2c413%2c138%2c416.5L138%2c420' id='mermaid-0-L_layout_program_0' class='edge-thickness-normal edge-pattern-solid edge-thickness-normal edge-pattern-solid flowchart-link' style='%3b' data-edge='true' data-et='edge' data-id='L_layout_program_0' data-points='W3sieCI6MTM4LCJ5IjozNzR9LHsieCI6MTM4LCJ5IjozOTl9LHsieCI6MTM4LCJ5Ijo0MjR9XQ==' data-look='classic' marker-end='url(%23mermaid-0_flowchart-v2-pointEnd)'/%3e%3cpath d='M138%2c502L138%2c506.167C138%2c510.333%2c138%2c518.667%2c138%2c526.333C138%2c534%2c138%2c541%2c138%2c544.5L138%2c548' id='mermaid-0-L_program_leave_0' class='edge-thickness-normal edge-pattern-solid edge-thickness-normal edge-pattern-solid flowchart-link' style='%3b' data-edge='true' data-et='edge' data-id='L_program_leave_0' data-points='W3sieCI6MTM4LCJ5Ijo1MDJ9LHsieCI6MTM4LCJ5Ijo1Mjd9LHsieCI6MTM4LCJ5Ijo1NTJ9XQ==' data-look='classic' marker-end='url(%23mermaid-0_flowchart-v2-pointEnd)'/%3e%3cpath d='M138%2c606L138%2c610.167C138%2c614.333%2c138%2c622.667%2c138%2c630.333C138%2c638%2c138%2c645%2c138%2c648.5L138%2c652' id='mermaid-0-L_leave_U-Boot_0' class='edge-thickness-normal edge-pattern-solid edge-thickness-normal edge-pattern-solid flowchart-link' style='%3b' data-edge='true' data-et='edge' data-id='L_leave_U-Boot_0' data-points='W3sieCI6MTM4LCJ5Ijo2MDZ9LHsieCI6MTM4LCJ5Ijo2MzF9LHsieCI6MTM4LCJ5Ijo2NTZ9XQ==' data-look='classic' marker-end='url(%23mermaid-0_flowchart-v2-pointEnd)'/%3e%3cpath d='M138%2c710L138%2c714.167C138%2c718.333%2c138%2c726.667%2c138%2c734.333C138%2c742%2c138%2c749%2c138%2c752.5L138%2c756' id='mermaid-0-L_U-Boot_expose_0' class='edge-thickness-normal edge-pattern-solid edge-thickness-normal edge-pattern-solid flowchart-link' style='%3b' data-edge='true' data-et='edge' data-id='L_U-Boot_expose_0' data-points='W3sieCI6MTM4LCJ5Ijo3MTB9LHsieCI6MTM4LCJ5Ijo3MzV9LHsieCI6MTM4LCJ5Ijo3NjB9XQ==' data-look='classic' marker-end='url(%23mermaid-0_flowchart-v2-pointEnd)'/%3e%3cpath d='M138%2c838L138%2c842.167C138%2c846.333%2c138%2c854.667%2c138%2c862.333C138%2c870%2c138%2c877%2c138%2c880.5L138%2c884' id='mermaid-0-L_expose_write_0' class='edge-thickness-normal edge-pattern-solid edge-thickness-normal edge-pattern-solid flowchart-link' style='%3b' data-edge='true' data-et='edge' data-id='L_expose_write_0' data-points='W3sieCI6MTM4LCJ5Ijo4Mzh9LHsieCI6MTM4LCJ5Ijo4NjN9LHsieCI6MTM4LCJ5Ijo4ODh9XQ==' data-look='classic' marker-end='url(%23mermaid-0_flowchart-v2-pointEnd)'/%3e%3c/g%3e%3cg class='edgeLabels'%3e%3cg class='edgeLabel'%3e%3cg class='label' data-id='L_dfu_ftp_0' transform='translate(0%2c 0)'%3e%3cforeignObject width='0' height='0'%3e%3cdiv xmlns='http://www.w3.org/1999/xhtml' class='labelBkg' style='display: table-cell%3b white-space: nowrap%3b line-height: 1.5%3b max-width: 200px%3b text-align: center%3b'%3e%3cspan class='edgeLabel'%3e%3c/span%3e%3c/div%3e%3c/foreignObject%3e%3c/g%3e%3c/g%3e%3cg class='edgeLabel'%3e%3cg class='label' data-id='L_ftp_programmer_0' transform='translate(0%2c 0)'%3e%3cforeignObject width='0' height='0'%3e%3cdiv xmlns='http://www.w3.org/1999/xhtml' class='labelBkg' style='display: table-cell%3b white-space: nowrap%3b line-height: 1.5%3b max-width: 200px%3b text-align: center%3b'%3e%3cspan class='edgeLabel'%3e%3c/span%3e%3c/div%3e%3c/foreignObject%3e%3c/g%3e%3c/g%3e%3cg class='edgeLabel'%3e%3cg class='label' data-id='L_programmer_layout_0' transform='translate(0%2c 0)'%3e%3cforeignObject width='0' height='0'%3e%3cdiv xmlns='http://www.w3.org/1999/xhtml' class='labelBkg' style='display: table-cell%3b white-space: nowrap%3b line-height: 1.5%3b max-width: 200px%3b text-align: center%3b'%3e%3cspan class='edgeLabel'%3e%3c/span%3e%3c/div%3e%3c/foreignObject%3e%3c/g%3e%3c/g%3e%3cg class='edgeLabel'%3e%3cg class='label' data-id='L_layout_program_0' transform='translate(0%2c 0)'%3e%3cforeignObject width='0' height='0'%3e%3cdiv xmlns='http://www.w3.org/1999/xhtml' class='labelBkg' style='display: table-cell%3b white-space: nowrap%3b line-height: 1.5%3b max-width: 200px%3b text-align: center%3b'%3e%3cspan class='edgeLabel'%3e%3c/span%3e%3c/div%3e%3c/foreignObject%3e%3c/g%3e%3c/g%3e%3cg class='edgeLabel'%3e%3cg class='label' data-id='L_program_leave_0' transform='translate(0%2c 0)'%3e%3cforeignObject width='0' height='0'%3e%3cdiv xmlns='http://www.w3.org/1999/xhtml' class='labelBkg' style='display: table-cell%3b white-space: nowrap%3b line-height: 1.5%3b max-width: 200px%3b text-align: center%3b'%3e%3cspan class='edgeLabel'%3e%3c/span%3e%3c/div%3e%3c/foreignObject%3e%3c/g%3e%3c/g%3e%3cg class='edgeLabel'%3e%3cg class='label' data-id='L_leave_U-Boot_0' transform='translate(0%2c 0)'%3e%3cforeignObject width='0' height='0'%3e%3cdiv xmlns='http://www.w3.org/1999/xhtml' class='labelBkg' style='display: table-cell%3b white-space: nowrap%3b line-height: 1.5%3b max-width: 200px%3b text-align: center%3b'%3e%3cspan class='edgeLabel'%3e%3c/span%3e%3c/div%3e%3c/foreignObject%3e%3c/g%3e%3c/g%3e%3cg class='edgeLabel'%3e%3cg class='label' data-id='L_U-Boot_expose_0' transform='translate(0%2c 0)'%3e%3cforeignObject width='0' height='0'%3e%3cdiv xmlns='http://www.w3.org/1999/xhtml' class='labelBkg' style='display: table-cell%3b white-space: nowrap%3b line-height: 1.5%3b max-width: 200px%3b text-align: center%3b'%3e%3cspan class='edgeLabel'%3e%3c/span%3e%3c/div%3e%3c/foreignObject%3e%3c/g%3e%3c/g%3e%3cg class='edgeLabel'%3e%3cg class='label' data-id='L_expose_write_0' transform='translate(0%2c 0)'%3e%3cforeignObject width='0' height='0'%3e%3cdiv xmlns='http://www.w3.org/1999/xhtml' class='labelBkg' style='display: table-cell%3b white-space: nowrap%3b line-height: 1.5%3b max-width: 200px%3b text-align: center%3b'%3e%3cspan class='edgeLabel'%3e%3c/span%3e%3c/div%3e%3c/foreignObject%3e%3c/g%3e%3c/g%3e%3c/g%3e%3cg class='nodes'%3e%3cg class='node default' id='mermaid-0-flowchart-dfu-0' data-look='classic' transform='translate(138%2c 35)'%3e%3crect class='basic label-container' style='' x='-95.3359375' y='-27' width='190.671875' height='54'/%3e%3cg class='label' style='' transform='translate(-65.3359375%2c -12)'%3e%3crect/%3e%3cforeignObject width='130.671875' height='24'%3e%3cdiv xmlns='http://www.w3.org/1999/xhtml' style='display: table-cell%3b white-space: nowrap%3b line-height: 1.5%3b max-width: 200px%3b text-align: center%3b'%3e%3cspan class='nodeLabel'%3e%3cp%3eSTM32 ROM DFU%3c/p%3e%3c/span%3e%3c/div%3e%3c/foreignObject%3e%3c/g%3e%3c/g%3e%3cg class='node default' id='mermaid-0-flowchart-ftp-1' data-look='classic' transform='translate(138%2c 139)'%3e%3crect class='basic label-container' style='' x='-127.0078125' y='-27' width='254.015625' height='54'/%3e%3cg class='label' style='' transform='translate(-97.0078125%2c -12)'%3e%3crect/%3e%3cforeignObject width='194.015625' height='24'%3e%3cdiv xmlns='http://www.w3.org/1999/xhtml' style='display: table-cell%3b white-space: nowrap%3b line-height: 1.5%3b max-width: 200px%3b text-align: center%3b'%3e%3cspan class='nodeLabel'%3e%3cp%3eLoad temporary TF-A %2b FIP%3c/p%3e%3c/span%3e%3c/div%3e%3c/foreignObject%3e%3c/g%3e%3c/g%3e%3cg class='node default' id='mermaid-0-flowchart-programmer-2' data-look='classic' transform='translate(138%2c 243)'%3e%3crect class='basic label-container' style='' x='-101.578125' y='-27' width='203.15625' height='54'/%3e%3cg class='label' style='' transform='translate(-71.578125%2c -12)'%3e%3crect/%3e%3cforeignObject width='143.15625' height='24'%3e%3cdiv xmlns='http://www.w3.org/1999/xhtml' style='display: table-cell%3b white-space: nowrap%3b line-height: 1.5%3b max-width: 200px%3b text-align: center%3b'%3e%3cspan class='nodeLabel'%3e%3cp%3eSTM32 programmer%3c/p%3e%3c/span%3e%3c/div%3e%3c/foreignObject%3e%3c/g%3e%3c/g%3e%3cg class='node default' id='mermaid-0-flowchart-layout-3' data-look='classic' transform='translate(138%2c 347)'%3e%3crect class='basic label-container' style='' x='-94.4921875' y='-27' width='188.984375' height='54'/%3e%3cg class='label' style='' transform='translate(-64.4921875%2c -12)'%3e%3crect/%3e%3cforeignObject width='128.984375' height='24'%3e%3cdiv xmlns='http://www.w3.org/1999/xhtml' style='display: table-cell%3b white-space: nowrap%3b line-height: 1.5%3b max-width: 200px%3b text-align: center%3b'%3e%3cspan class='nodeLabel'%3e%3cp%3eSend FlashLayout%3c/p%3e%3c/span%3e%3c/div%3e%3c/foreignObject%3e%3c/g%3e%3c/g%3e%3cg class='node default' id='mermaid-0-flowchart-program-4' data-look='classic' transform='translate(138%2c 463)'%3e%3crect class='basic label-container' style='' x='-130' y='-39' width='260' height='78'/%3e%3cg class='label' style='' transform='translate(-100%2c -24)'%3e%3crect/%3e%3cforeignObject width='200' height='48'%3e%3cdiv xmlns='http://www.w3.org/1999/xhtml' style='display: table%3b white-space: break-spaces%3b line-height: 1.5%3b max-width: 200px%3b text-align: center%3b width: 200px%3b'%3e%3cspan class='nodeLabel'%3e%3cp%3eProgram eMMC boot1 and boot2%3c/p%3e%3c/span%3e%3c/div%3e%3c/foreignObject%3e%3c/g%3e%3c/g%3e%3cg class='node default' id='mermaid-0-flowchart-leave-5' data-look='classic' transform='translate(138%2c 579)'%3e%3crect class='basic label-container' style='' x='-125.59375' y='-27' width='251.1875' height='54'/%3e%3cg class='label' style='' transform='translate(-95.59375%2c -12)'%3e%3crect/%3e%3cforeignObject width='191.1875' height='24'%3e%3cdiv xmlns='http://www.w3.org/1999/xhtml' style='display: table-cell%3b white-space: nowrap%3b line-height: 1.5%3b max-width: 200px%3b text-align: center%3b'%3e%3cspan class='nodeLabel'%3e%3cp%3eLeave STM32 programmer%3c/p%3e%3c/span%3e%3c/div%3e%3c/foreignObject%3e%3c/g%3e%3c/g%3e%3cg class='node default' id='mermaid-0-flowchart-U-Boot-6' data-look='classic' transform='translate(138%2c 683)'%3e%3crect class='basic label-container' style='' x='-54.8984375' y='-27' width='109.796875' height='54'/%3e%3cg class='label' style='' transform='translate(-24.8984375%2c -12)'%3e%3crect/%3e%3cforeignObject width='49.796875' height='24'%3e%3cdiv xmlns='http://www.w3.org/1999/xhtml' style='display: table-cell%3b white-space: nowrap%3b line-height: 1.5%3b max-width: 200px%3b text-align: center%3b'%3e%3cspan class='nodeLabel'%3e%3cp%3eU-Boot%3c/p%3e%3c/span%3e%3c/div%3e%3c/foreignObject%3e%3c/g%3e%3c/g%3e%3cg class='node default' id='mermaid-0-flowchart-expose-7' data-look='classic' transform='translate(138%2c 799)'%3e%3crect class='basic label-container' style='' x='-130' y='-39' width='260' height='78'/%3e%3cg class='label' style='' transform='translate(-100%2c -24)'%3e%3crect/%3e%3cforeignObject width='200' height='48'%3e%3cdiv xmlns='http://www.w3.org/1999/xhtml' style='display: table%3b white-space: break-spaces%3b line-height: 1.5%3b max-width: 200px%3b text-align: center%3b width: 200px%3b'%3e%3cspan class='nodeLabel'%3e%3cp%3eExpose eMMC using USB Mass Storage%3c/p%3e%3c/span%3e%3c/div%3e%3c/foreignObject%3e%3c/g%3e%3c/g%3e%3cg class='node default' id='mermaid-0-flowchart-write-8' data-look='classic' transform='translate(138%2c 927)'%3e%3crect class='basic label-container' style='' x='-130' y='-39' width='260' height='78'/%3e%3cg class='label' style='' transform='translate(-100%2c -24)'%3e%3crect/%3e%3cforeignObject width='200' height='48'%3e%3cdiv xmlns='http://www.w3.org/1999/xhtml' style='display: table%3b white-space: break-spaces%3b line-height: 1.5%3b max-width: 200px%3b text-align: center%3b width: 200px%3b'%3e%3cspan class='nodeLabel'%3e%3cp%3eWrite WIC image to eMMC user area%3c/p%3e%3c/span%3e%3c/div%3e%3c/foreignObject%3e%3c/g%3e%3c/g%3e%3c/g%3e%3c/g%3e%3c/g%3e%3cdefs%3e%3cfilter id='mermaid-0-drop-shadow' height='130%25' width='130%25'%3e%3cfeDropShadow dx='4' dy='4' stdDeviation='0' flood-opacity='0.06' flood-color='black'/%3e%3c/filter%3e%3c/defs%3e%3cdefs%3e%3cfilter id='mermaid-0-drop-shadow-small' height='150%25' width='150%25'%3e%3cfeDropShadow dx='2' dy='2' stdDeviation='0' flood-opacity='0.06' flood-color='black'/%3e%3c/filter%3e%3c/defs%3e%3c/svg%3e)
STM32CubeProgrammer wraps most of that up behind its programming interface.
Starting from ROM DFU
The board was configured to start in the STM32MP1 USB recovery mode. On the host this appeared as a USB device:
0483:df11Snagrecover supports the STM32MP1 recovery mechanism directly. My Yocto project build creates the required programmer files, so I could copy them from the deploy directory.
I could therefore start the temporary programmer with:
snagrecover \
    -s stm32mp15 \
    -F "{'tf-a': {'path': 'tf-a-programmer.stm32'}}" \
    -F "{'fip': {'path': 'fip-programmer.bin'}}"
This bootstraps enough firmware into the board for the next stage of programming.
DFU kept changing underneath me
One useful debugging tool during this work was simply:
dfu-util -lAt one stage, for example, I could see:
Found DFU: [0483:df11] ... alt=3, name="@PMIC/..."
Found DFU: [0483:df11] ... alt=2, name="@OTP/..."
The exact interfaces available depended on which stage the STM32 programmer was in. This became particularly important after sending the FlashLayout.
I initially treated the FlashLayout mostly as a description of what needed to be programmed. In practice it also an essential part of the STM32 programming protocol. Sending it causes the programmer to move on to the partition-programming phase and re-enumerate its DFU interfaces.
My flasher therefore couldn’t just send the FlashLayout and immediately assume the next DFU operation would work. It explicitly waits until the required partition interface appears:
def wait_for_partition_dfu():
    log("Waiting for partition DFU interface...")

    deadline = time.monotonic() + 10

    while time.monotonic() < deadline:
        SnagbootUSBContext.hard_rescan()

        usb_addr = find_usb_path(DFU_VID, DFU_PID)

        if usb_addr is None:
            time.sleep(0.1)
            continue

        dev = get_usb(
            usb_addr,
            error_on_fail=False,
        )

        if dev is None:
            time.sleep(0.1)
            continue

        if has_altsetting(dev, 10):
            log("Partition DFU interface ready.")
            return dev

        usb.util.dispose_resources(dev)
        time.sleep(0.1)

    raise FlashError("Timed out waiting for partition DFU interface")
This is one of those details that is easy to miss when using a vendor programming tool. From the outside it looks like one USB programming session. Underneath, the target is changing state and exposing different interfaces as it progresses.
Programming the eMMC boot partitions
After processing the FlashLayout, the programmer was ready for the eMMC boot partitions.
Boot partition 1 could be written using its DFU alternate setting:
download_file_to_device(
    partition_dev,
    0,
    tf_a_emmc,
)
Boot partition 2 required another STM32 programmer phase.
The programmer exposes a virtual DFU interface through which a five-byte command can be sent. The first byte selects the phase and the remaining four bytes contain the address or offset.
For my case the offset was zero:
payload = bytes(
    [
        phase,
        0x00,
        0x00,
        0x00,
        0x00,
    ]
)
I could then select phase 0x05 before programming boot partition 2:
select_phase(
    0x05,
    virtual_alt=10,
)

download_file(
    1,
    tf_a_emmc,
)
At this point I had reproduced the part of the STM32CubeProgrammer process responsible for installing the firmware into both eMMC boot areas.
DFU is slow…
The installer image for this system is generated by Yocto as a compressed WIC image together with its bmap:
installer-image.rootfs.wic.xz
installer-image.rootfs.wic.bmap
I could have continued trying to reproduce more of STM32CubeProgrammer’s programming behaviour through DFU. But by this stage there was already a perfectly capable piece of software running on the board: U-Boot.
Rather than invent another way to transfer a large disk image through the STM32 programmer protocol, I could get U-Boot to expose the eMMC directly to the host using the USB Mass Storage:
ums 0 mmc 1Reusing the U-Boot that was already running
The temporary programmer firmware includes U-Boot, so after finishing with the STM32 programmer I could send a DFU detach rather than rebooting the board:
def detach_stm32_programmer(virtual_alt: int):
    dev = find_dfu_device()

    try:
        dfu_detach(dev, virtual_alt)
    finally:
        usb.util.dispose_resources(dev)
That shuts down the DFU gadget while leaving me with the existing U-Boot instance.
I could then use the board’s serial console to issue the UMS command:
console = serial.Serial(
    serial_device,
    baudrate=115200,
    timeout=0.2,
    write_timeout=2,
)

time.sleep(0.5)

console.reset_input_buffer()
console.reset_output_buffer()

console.write(b"\r")
console.flush()

time.sleep(0.1)

console.write(b"ums 0 mmc 1\r")
console.flush()
There was some investigation involved here because sending a command to a U-Boot serial console immediately after shutting down another USB gadget isn’t quite the same as typing it into an idle prompt.
The final sequence includes the short delay, sends a carriage return first and then sends the UMS command. Once that succeeds, the board disappears as the STM32 DFU device and reappears as a USB device:
0483:5720More importantly, Linux now sees the eMMC as an ordinary SCSI block device such as:
/dev/sdbThis meant I could now write directly to the eMMC.
Finding the right block device matters
Automatically writing a WIC image to /dev/sdX deserves a certain amount of paranoia. Choosing the wrong disk would make for a rather different Tales from the Trenches article.
I didn’t want the script to assume that the newly appearing /dev/sdX was necessarily the target.
Instead, I walked the Linux sysfs hierarchy for each candidate block device until it finds the parent USB device. It then checks that device’s USB VID and PID:
if vid.lower() != f"{UMS_VID:04x}":
    continue

if pid.lower() != f"{UMS_PID:04x}":
    continue
I also captured the STM32 USB serial number at the start of the process and compare it with the serial number of the UMS device. That means the script can follow the same physical board as it changes from DFU into USB Mass Storage.
There is another sanity check before anything is written: the size of the discovered disk must fall within the expected range for the eMMC fitted to this hardware.
None of these checks make the flashing itself faster. They just make automating the flashing considerably less exciting.
Writing the WIC with bmap
Once U-Boot exposes the eMMC as a normal block device, the actual user-area programming becomes straightforward.
I used Snagflash’s bmap_copy():
with open(device, "rb+", buffering=0) as destination:

    bmap_copy(
        str(image),
        destination,
        None,
    )

    destination.flush()
    os.fsync(destination.fileno())
Again, I was able to make use of the artifacts from the Yocto build as I had configured it to create .wic.xz files.
installer-image.rootfs.wic.xz
installer-image.rootfs.wic.bmap
The WIC image describes the complete eMMC user-area layout I want, while the bmap describes which blocks actually contain data. There is therefore no reason for my flashing script to understand the individual Linux partitions within the WIC image.
At this stage it is just writing the disk image produced by the build system. It also means the large user-area image doesn’t need to go through the STM32 programmer’s skow DFU partition protocol.
The complete flashing process became:
%3btext-align:center%3b%7d%23mermaid-1 .edgeLabel p%7bbackground-color:rgba(232%2c232%2c232%2c 0.8)%3b%7d%23mermaid-1 .edgeLabel rect%7bopacity:0.5%3bbackground-color:rgba(232%2c232%2c232%2c 0.8)%3bfill:rgba(232%2c232%2c232%2c 0.8)%3b%7d%23mermaid-1 .labelBkg%7bbackground-color:rgba(232%2c 232%2c 232%2c 0.5)%3b%7d%23mermaid-1 .cluster rect%7bfill:%23ffffde%3bstroke:%23aaaa33%3bstroke-width:1px%3b%7d%23mermaid-1 .cluster text%7bfill:%23333%3b%7d%23mermaid-1 .cluster span%7bcolor:%23333%3b%7d%23mermaid-1 .node .collapsed-indicator%7bfill:%23aaaa33%3bstroke:none%3bopacity:0.6%3b%7d%23mermaid-1 .node .collapsed-separator%7bstroke:%23aaaa33%3bstroke-width:0.75px%3b%7d%23mermaid-1 div.mermaidTooltip%7bposition:absolute%3btext-align:center%3bmax-width:200px%3bpadding:2px%3bfont-family:arial%2csans-serif%3bfont-size:12px%3bbackground:hsl(80%2c 100%25%2c 96.2745098039%25)%3bborder:1px solid %23aaaa33%3bborder-radius:2px%3bpointer-events:none%3bz-index:100%3b%7d%23mermaid-1 .flowchartTitleText%7btext-anchor:middle%3bfont-size:18px%3bfill:%23333%3b%7d%23mermaid-1 rect.text%7bfill:none%3bstroke-width:0%3b%7d%23mermaid-1 .icon-shape%2c%23mermaid-1 .image-shape%7bbackground-color:rgba(232%2c232%2c232%2c 0.8)%3btext-align:center%3b%7d%23mermaid-1 .icon-shape p%2c%23mermaid-1 .image-shape p%7bbackground-color:rgba(232%2c232%2c232%2c 0.8)%3bpadding:2px%3b%7d%23mermaid-1 .icon-shape .label rect%2c%23mermaid-1 .image-shape .label rect%7bopacity:0.5%3bbackground-color:rgba(232%2c232%2c232%2c 0.8)%3bfill:rgba(232%2c232%2c232%2c 0.8)%3b%7d%23mermaid-1 .label-icon%7bdisplay:inline-block%3bheight:1em%3boverflow:visible%3bvertical-align:-0.125em%3b%7d%23mermaid-1 .node .label-icon path%7bfill:currentColor%3bstroke:revert%3bstroke-width:revert%3b%7d%23mermaid-1 .node .neo-node%7bstroke:%239370DB%3b%7d%23mermaid-1 %5bdata-look='neo'%5d.node rect%2c%23mermaid-1 %5bdata-look='neo'%5d.cluster rect%2c%23mermaid-1 %5bdata-look='neo'%5d.node polygon%7bstroke:%239370DB%3bfilter:drop-shadow(1px 2px 2px rgba(185%2c 185%2c 185%2c 1))%3b%7d%23mermaid-1 %5bdata-look='neo'%5d.swimlane.cluster rect%7bfilter:none%3b%7d%23mermaid-1 %5bdata-look='neo'%5d.node path%7bstroke:%239370DB%3bstroke-width:1px%3b%7d%23mermaid-1 %5bdata-look='neo'%5d.node .outer-path%7bfilter:drop-shadow(1px 2px 2px rgba(185%2c 185%2c 185%2c 1))%3b%7d%23mermaid-1 %5bdata-look='neo'%5d.node .neo-line path%7bstroke:%239370DB%3bfilter:none%3b%7d%23mermaid-1 %5bdata-look='neo'%5d.node circle%7bstroke:%239370DB%3bfilter:drop-shadow(1px 2px 2px rgba(185%2c 185%2c 185%2c 1))%3b%7d%23mermaid-1 %5bdata-look='neo'%5d.node circle .state-start%7bfill:black%3b%7d%23mermaid-1 %5bdata-look='neo'%5d.icon-shape .icon%7bfill:%239370DB%3bfilter:drop-shadow(1px 2px 2px rgba(185%2c 185%2c 185%2c 1))%3b%7d%23mermaid-1 %5bdata-look='neo'%5d.icon-shape .icon-neo path%7bstroke:%239370DB%3bfilter:drop-shadow(1px 2px 2px rgba(185%2c 185%2c 185%2c 1))%3b%7d%23mermaid-1 :root%7b--mermaid-font-family:arial%2csans-serif%3b%7d%3c/style%3e%3cg%3e%3cmarker id='mermaid-1_flowchart-v2-pointEnd' class='marker flowchart-v2' viewBox='0 0 10 10' refX='5' refY='5' markerUnits='userSpaceOnUse' markerWidth='8' markerHeight='8' orient='auto'%3e%3cpath d='M 0 0 L 10 5 L 0 10 z' class='arrowMarkerPath' style='stroke-width: 1%3b stroke-dasharray: 1%2c 0%3b'/%3e%3c/marker%3e%3cmarker id='mermaid-1_flowchart-v2-pointStart' class='marker flowchart-v2' viewBox='0 0 10 10' refX='4.5' refY='5' markerUnits='userSpaceOnUse' markerWidth='8' markerHeight='8' orient='auto'%3e%3cpath d='M 0 5 L 10 10 L 10 0 z' class='arrowMarkerPath' style='stroke-width: 1%3b stroke-dasharray: 1%2c 0%3b'/%3e%3c/marker%3e%3cmarker id='mermaid-1_flowchart-v2-pointEnd-margin' class='marker flowchart-v2' viewBox='0 0 11.5 14' refX='11.5' refY='7' markerUnits='userSpaceOnUse' markerWidth='10.5' markerHeight='14' orient='auto'%3e%3cpath d='M 0 0 L 11.5 7 L 0 14 z' class='arrowMarkerPath' style='stroke-width: 0%3b stroke-dasharray: 1%2c 0%3b'/%3e%3c/marker%3e%3cmarker id='mermaid-1_flowchart-v2-pointStart-margin' class='marker flowchart-v2' viewBox='0 0 11.5 14' refX='1' refY='7' markerUnits='userSpaceOnUse' markerWidth='11.5' markerHeight='14' orient='auto'%3e%3cpolygon points='0%2c7 11.5%2c14 11.5%2c0' class='arrowMarkerPath' style='stroke-width: 0%3b stroke-dasharray: 1%2c 0%3b'/%3e%3c/marker%3e%3cmarker id='mermaid-1_flowchart-v2-circleEnd' class='marker flowchart-v2' viewBox='0 0 10 10' refX='11' refY='5' markerUnits='userSpaceOnUse' markerWidth='11' markerHeight='11' orient='auto'%3e%3ccircle cx='5' cy='5' r='5' class='arrowMarkerPath' style='stroke-width: 1%3b stroke-dasharray: 1%2c 0%3b'/%3e%3c/marker%3e%3cmarker id='mermaid-1_flowchart-v2-circleStart' class='marker flowchart-v2' viewBox='0 0 10 10' refX='-1' refY='5' markerUnits='userSpaceOnUse' markerWidth='11' markerHeight='11' orient='auto'%3e%3ccircle cx='5' cy='5' r='5' class='arrowMarkerPath' style='stroke-width: 1%3b stroke-dasharray: 1%2c 0%3b'/%3e%3c/marker%3e%3cmarker id='mermaid-1_flowchart-v2-circleEnd-margin' class='marker flowchart-v2' viewBox='0 0 10 10' refY='5' refX='12.25' markerUnits='userSpaceOnUse' markerWidth='14' markerHeight='14' orient='auto'%3e%3ccircle cx='5' cy='5' r='5' class='arrowMarkerPath' style='stroke-width: 0%3b stroke-dasharray: 1%2c 0%3b'/%3e%3c/marker%3e%3cmarker id='mermaid-1_flowchart-v2-circleStart-margin' class='marker flowchart-v2' viewBox='0 0 10 10' refX='-2' refY='5' markerUnits='userSpaceOnUse' markerWidth='14' markerHeight='14' orient='auto'%3e%3ccircle cx='5' cy='5' r='5' class='arrowMarkerPath' style='stroke-width: 0%3b stroke-dasharray: 1%2c 0%3b'/%3e%3c/marker%3e%3cmarker id='mermaid-1_flowchart-v2-crossEnd' class='marker cross flowchart-v2' viewBox='0 0 11 11' refX='12' refY='5.2' markerUnits='userSpaceOnUse' markerWidth='11' markerHeight='11' orient='auto'%3e%3cpath d='M 1%2c1 l 9%2c9 M 10%2c1 l -9%2c9' class='arrowMarkerPath' style='stroke-width: 2%3b stroke-dasharray: 1%2c 0%3b'/%3e%3c/marker%3e%3cmarker id='mermaid-1_flowchart-v2-crossStart' class='marker cross flowchart-v2' viewBox='0 0 11 11' refX='-1' refY='5.2' markerUnits='userSpaceOnUse' markerWidth='11' markerHeight='11' orient='auto'%3e%3cpath d='M 1%2c1 l 9%2c9 M 10%2c1 l -9%2c9' class='arrowMarkerPath' style='stroke-width: 2%3b stroke-dasharray: 1%2c 0%3b'/%3e%3c/marker%3e%3cmarker id='mermaid-1_flowchart-v2-crossEnd-margin' class='marker cross flowchart-v2' viewBox='0 0 15 15' refX='17.7' refY='7.5' markerUnits='userSpaceOnUse' markerWidth='12' markerHeight='12' orient='auto'%3e%3cpath d='M 1%2c1 L 14%2c14 M 1%2c14 L 14%2c1' class='arrowMarkerPath' style='stroke-width: 2.5%3b'/%3e%3c/marker%3e%3cmarker id='mermaid-1_flowchart-v2-crossStart-margin' class='marker cross flowchart-v2' viewBox='0 0 15 15' refX='-3.5' refY='7.5' markerUnits='userSpaceOnUse' markerWidth='12' markerHeight='12' orient='auto'%3e%3cpath d='M 1%2c1 L 14%2c14 M 1%2c14 L 14%2c1' class='arrowMarkerPath' style='stroke-width: 2.5%3b stroke-dasharray: 1%2c 0%3b'/%3e%3c/marker%3e%3cg class='root'%3e%3cg class='clusters'/%3e%3cg class='edgePaths'%3e%3cpath d='M366.297%2c62L366.297%2c68.167C366.297%2c74.333%2c366.297%2c86.667%2c366.297%2c98.333C366.297%2c110%2c366.297%2c121%2c366.297%2c126.5L366.297%2c132' id='mermaid-1-L_STM32MP157_snagrecover_0' class='edge-thickness-normal edge-pattern-solid edge-thickness-normal edge-pattern-solid flowchart-link' style='%3b' data-edge='true' data-et='edge' data-id='L_STM32MP157_snagrecover_0' data-points='W3sieCI6MzY2LjI5Njg3NSwieSI6NjJ9LHsieCI6MzY2LjI5Njg3NSwieSI6OTl9LHsieCI6MzY2LjI5Njg3NSwieSI6MTM2fV0=' data-look='classic' marker-end='url(%23mermaid-1_flowchart-v2-pointEnd)'/%3e%3cpath d='M366.297%2c190L366.297%2c196.167C366.297%2c202.333%2c366.297%2c214.667%2c366.297%2c226.333C366.297%2c238%2c366.297%2c249%2c366.297%2c254.5L366.297%2c260' id='mermaid-1-L_snagrecover_programmer_0' class='edge-thickness-normal edge-pattern-solid edge-thickness-normal edge-pattern-solid flowchart-link' style='%3b' data-edge='true' data-et='edge' data-id='L_snagrecover_programmer_0' data-points='W3sieCI6MzY2LjI5Njg3NSwieSI6MTkwfSx7IngiOjM2Ni4yOTY4NzUsInkiOjIyN30seyJ4IjozNjYuMjk2ODc1LCJ5IjoyNjR9XQ==' data-look='classic' marker-end='url(%23mermaid-1_flowchart-v2-pointEnd)'/%3e%3cpath d='M317.775%2c318L306.692%2c324.167C295.61%2c330.333%2c273.446%2c342.667%2c262.363%2c354.333C251.281%2c366%2c251.281%2c377%2c251.281%2c382.5L251.281%2c388' id='mermaid-1-L_programmer_boot1_0' class='edge-thickness-normal edge-pattern-solid edge-thickness-normal edge-pattern-solid flowchart-link' style='%3b' data-edge='true' data-et='edge' data-id='L_programmer_boot1_0' data-points='W3sieCI6MzE3Ljc3NDY1ODIwMzEyNSwieSI6MzE4fSx7IngiOjI1MS4yODEyNSwieSI6MzU1fSx7IngiOjI1MS4yODEyNSwieSI6MzkyfV0=' data-look='classic' marker-end='url(%23mermaid-1_flowchart-v2-pointEnd)'/%3e%3cpath d='M414.819%2c318L425.901%2c324.167C436.984%2c330.333%2c459.148%2c342.667%2c470.23%2c354.333C481.313%2c366%2c481.313%2c377%2c481.313%2c382.5L481.313%2c388' id='mermaid-1-L_programmer_boot2_0' class='edge-thickness-normal edge-pattern-solid edge-thickness-normal edge-pattern-solid flowchart-link' style='%3b' data-edge='true' data-et='edge' data-id='L_programmer_boot2_0' data-points='W3sieCI6NDE0LjgxOTA5MTc5Njg3NSwieSI6MzE4fSx7IngiOjQ4MS4zMTI1LCJ5IjozNTV9LHsieCI6NDgxLjMxMjUsInkiOjM5Mn1d' data-look='classic' marker-end='url(%23mermaid-1_flowchart-v2-pointEnd)'/%3e%3cpath d='M59.633%2c446L59.633%2c452.167C59.633%2c458.333%2c59.633%2c470.667%2c81.792%2c484.233C103.951%2c497.8%2c148.27%2c512.6%2c170.429%2c520L192.589%2c527.4' id='mermaid-1-L_UART_U-Boot_0' class='edge-thickness-normal edge-pattern-solid edge-thickness-normal edge-pattern-solid flowchart-link' style='%3b' data-edge='true' data-et='edge' data-id='L_UART_U-Boot_0' data-points='W3sieCI6NTkuNjMyODEyNSwieSI6NDQ2fSx7IngiOjU5LjYzMjgxMjUsInkiOjQ4M30seyJ4IjoxOTYuMzgyODEyNSwieSI6NTI4LjY2Njk1MjAxOTg5MzJ9XQ==' data-look='classic' marker-end='url(%23mermaid-1_flowchart-v2-pointEnd)'/%3e%3cpath d='M251.281%2c446L251.281%2c452.167C251.281%2c458.333%2c251.281%2c470.667%2c251.281%2c482.333C251.281%2c494%2c251.281%2c505%2c251.281%2c510.5L251.281%2c516' id='mermaid-1-L_boot1_U-Boot_0' class='edge-thickness-normal edge-pattern-solid edge-thickness-normal edge-pattern-solid flowchart-link' style='%3b' data-edge='true' data-et='edge' data-id='L_boot1_U-Boot_0' data-points='W3sieCI6MjUxLjI4MTI1LCJ5Ijo0NDZ9LHsieCI6MjUxLjI4MTI1LCJ5Ijo0ODN9LHsieCI6MjUxLjI4MTI1LCJ5Ijo1MjB9XQ==' data-look='classic' marker-end='url(%23mermaid-1_flowchart-v2-pointEnd)'/%3e%3cpath d='M481.313%2c446L481.313%2c452.167C481.313%2c458.333%2c481.313%2c470.667%2c452.766%2c484.776C424.219%2c498.885%2c367.126%2c514.769%2c338.58%2c522.712L310.033%2c530.654' id='mermaid-1-L_boot2_U-Boot_0' class='edge-thickness-normal edge-pattern-solid edge-thickness-normal edge-pattern-solid flowchart-link' style='%3b' data-edge='true' data-et='edge' data-id='L_boot2_U-Boot_0' data-points='W3sieCI6NDgxLjMxMjUsInkiOjQ0Nn0seyJ4Ijo0ODEuMzEyNSwieSI6NDgzfSx7IngiOjMwNi4xNzk2ODc1LCJ5Ijo1MzEuNzI1OTg4MzE2ODA0OH1d' data-look='classic' marker-end='url(%23mermaid-1_flowchart-v2-pointEnd)'/%3e%3cpath d='M251.281%2c574L251.281%2c580.167C251.281%2c586.333%2c251.281%2c598.667%2c251.281%2c610.333C251.281%2c622%2c251.281%2c633%2c251.281%2c638.5L251.281%2c644' id='mermaid-1-L_U-Boot_sdx_0' class='edge-thickness-normal edge-pattern-solid edge-thickness-normal edge-pattern-solid flowchart-link' style='%3b' data-edge='true' data-et='edge' data-id='L_U-Boot_sdx_0' data-points='W3sieCI6MjUxLjI4MTI1LCJ5Ijo1NzR9LHsieCI6MjUxLjI4MTI1LCJ5Ijo2MTF9LHsieCI6MjUxLjI4MTI1LCJ5Ijo2NDh9XQ==' data-look='classic' marker-end='url(%23mermaid-1_flowchart-v2-pointEnd)'/%3e%3cpath d='M251.281%2c702L251.281%2c708.167C251.281%2c714.333%2c251.281%2c726.667%2c251.281%2c738.333C251.281%2c750%2c251.281%2c761%2c251.281%2c766.5L251.281%2c772' id='mermaid-1-L_sdx_eMMC_0' class='edge-thickness-normal edge-pattern-solid edge-thickness-normal edge-pattern-solid flowchart-link' style='%3b' data-edge='true' data-et='edge' data-id='L_sdx_eMMC_0' data-points='W3sieCI6MjUxLjI4MTI1LCJ5Ijo3MDJ9LHsieCI6MjUxLjI4MTI1LCJ5Ijo3Mzl9LHsieCI6MjUxLjI4MTI1LCJ5Ijo3NzZ9XQ==' data-look='classic' marker-end='url(%23mermaid-1_flowchart-v2-pointEnd)'/%3e%3c/g%3e%3cg class='edgeLabels'%3e%3cg class='edgeLabel' transform='translate(366.296875%2c 99)'%3e%3cg class='label' data-id='L_STM32MP157_snagrecover_0' transform='translate(-37.328125%2c -12)'%3e%3cforeignObject width='74.65625' height='24'%3e%3cdiv xmlns='http://www.w3.org/1999/xhtml' class='labelBkg' style='display: table-cell%3b white-space: nowrap%3b line-height: 1.5%3b max-width: 200px%3b text-align: center%3b'%3e%3cspan class='edgeLabel'%3e%3cp%3eROM DFU%3c/p%3e%3c/span%3e%3c/div%3e%3c/foreignObject%3e%3c/g%3e%3c/g%3e%3cg class='edgeLabel' transform='translate(366.296875%2c 227)'%3e%3cg class='label' data-id='L_snagrecover_programmer_0' transform='translate(-84.6875%2c -12)'%3e%3cforeignObject width='169.375' height='24'%3e%3cdiv xmlns='http://www.w3.org/1999/xhtml' class='labelBkg' style='display: table-cell%3b white-space: nowrap%3b line-height: 1.5%3b max-width: 200px%3b text-align: center%3b'%3e%3cspan class='edgeLabel'%3e%3cp%3eTF-A %2b programmer FIP%3c/p%3e%3c/span%3e%3c/div%3e%3c/foreignObject%3e%3c/g%3e%3c/g%3e%3cg class='edgeLabel' transform='translate(251.28125%2c 355)'%3e%3cg class='label' data-id='L_programmer_boot1_0' transform='translate(-43.5859375%2c -12)'%3e%3cforeignObject width='87.171875' height='24'%3e%3cdiv xmlns='http://www.w3.org/1999/xhtml' class='labelBkg' style='display: table-cell%3b white-space: nowrap%3b line-height: 1.5%3b max-width: 200px%3b text-align: center%3b'%3e%3cspan class='edgeLabel'%3e%3cp%3eFlashLayout%3c/p%3e%3c/span%3e%3c/div%3e%3c/foreignObject%3e%3c/g%3e%3c/g%3e%3cg class='edgeLabel' transform='translate(481.3125%2c 355)'%3e%3cg class='label' data-id='L_programmer_boot2_0' transform='translate(-43.5859375%2c -12)'%3e%3cforeignObject width='87.171875' height='24'%3e%3cdiv xmlns='http://www.w3.org/1999/xhtml' class='labelBkg' style='display: table-cell%3b white-space: nowrap%3b line-height: 1.5%3b max-width: 200px%3b text-align: center%3b'%3e%3cspan class='edgeLabel'%3e%3cp%3eFlashLayout%3c/p%3e%3c/span%3e%3c/div%3e%3c/foreignObject%3e%3c/g%3e%3c/g%3e%3cg class='edgeLabel' transform='translate(59.6328125%2c 483)'%3e%3cg class='label' data-id='L_UART_U-Boot_0' transform='translate(-48.0078125%2c -12)'%3e%3cforeignObject width='96.015625' height='24'%3e%3cdiv xmlns='http://www.w3.org/1999/xhtml' class='labelBkg' style='display: table-cell%3b white-space: nowrap%3b line-height: 1.5%3b max-width: 200px%3b text-align: center%3b'%3e%3cspan class='edgeLabel'%3e%3cp%3eums 0 mmc 1%3c/p%3e%3c/span%3e%3c/div%3e%3c/foreignObject%3e%3c/g%3e%3c/g%3e%3cg class='edgeLabel' transform='translate(251.28125%2c 483)'%3e%3cg class='label' data-id='L_boot1_U-Boot_0' transform='translate(-44.015625%2c -12)'%3e%3cforeignObject width='88.03125' height='24'%3e%3cdiv xmlns='http://www.w3.org/1999/xhtml' class='labelBkg' style='display: table-cell%3b white-space: nowrap%3b line-height: 1.5%3b max-width: 200px%3b text-align: center%3b'%3e%3cspan class='edgeLabel'%3e%3cp%3eDFU Detach%3c/p%3e%3c/span%3e%3c/div%3e%3c/foreignObject%3e%3c/g%3e%3c/g%3e%3cg class='edgeLabel' transform='translate(481.3125%2c 483)'%3e%3cg class='label' data-id='L_boot2_U-Boot_0' transform='translate(-44.015625%2c -12)'%3e%3cforeignObject width='88.03125' height='24'%3e%3cdiv xmlns='http://www.w3.org/1999/xhtml' class='labelBkg' style='display: table-cell%3b white-space: nowrap%3b line-height: 1.5%3b max-width: 200px%3b text-align: center%3b'%3e%3cspan class='edgeLabel'%3e%3cp%3eDFU Detach%3c/p%3e%3c/span%3e%3c/div%3e%3c/foreignObject%3e%3c/g%3e%3c/g%3e%3cg class='edgeLabel' transform='translate(251.28125%2c 611)'%3e%3cg class='label' data-id='L_U-Boot_sdx_0' transform='translate(-68.03125%2c -12)'%3e%3cforeignObject width='136.0625' height='24'%3e%3cdiv xmlns='http://www.w3.org/1999/xhtml' class='labelBkg' style='display: table-cell%3b white-space: nowrap%3b line-height: 1.5%3b max-width: 200px%3b text-align: center%3b'%3e%3cspan class='edgeLabel'%3e%3cp%3eUSB Mass Storage%3c/p%3e%3c/span%3e%3c/div%3e%3c/foreignObject%3e%3c/g%3e%3c/g%3e%3cg class='edgeLabel' transform='translate(251.28125%2c 739)'%3e%3cg class='label' data-id='L_sdx_eMMC_0' transform='translate(-54.90625%2c -12)'%3e%3cforeignObject width='109.8125' height='24'%3e%3cdiv xmlns='http://www.w3.org/1999/xhtml' class='labelBkg' style='display: table-cell%3b white-space: nowrap%3b line-height: 1.5%3b max-width: 200px%3b text-align: center%3b'%3e%3cspan class='edgeLabel'%3e%3cp%3ebmap %2b WIC.xz%3c/p%3e%3c/span%3e%3c/div%3e%3c/foreignObject%3e%3c/g%3e%3c/g%3e%3c/g%3e%3cg class='nodes'%3e%3cg class='node default' id='mermaid-1-flowchart-STM32MP157-0' data-look='classic' transform='translate(366.296875%2c 35)'%3e%3crect class='basic label-container' style='' x='-81.1328125' y='-27' width='162.265625' height='54'/%3e%3cg class='label' style='' transform='translate(-51.1328125%2c -12)'%3e%3crect/%3e%3cforeignObject width='102.265625' height='24'%3e%3cdiv xmlns='http://www.w3.org/1999/xhtml' style='display: table-cell%3b white-space: nowrap%3b line-height: 1.5%3b max-width: 200px%3b text-align: center%3b'%3e%3cspan class='nodeLabel'%3e%3cp%3eSTM32MP157%3c/p%3e%3c/span%3e%3c/div%3e%3c/foreignObject%3e%3c/g%3e%3c/g%3e%3cg class='node default' id='mermaid-1-flowchart-snagrecover-1' data-look='classic' transform='translate(366.296875%2c 163)'%3e%3crect class='basic label-container' style='' x='-74.0234375' y='-27' width='148.046875' height='54'/%3e%3cg class='label' style='' transform='translate(-44.0234375%2c -12)'%3e%3crect/%3e%3cforeignObject width='88.046875' height='24'%3e%3cdiv xmlns='http://www.w3.org/1999/xhtml' style='display: table-cell%3b white-space: nowrap%3b line-height: 1.5%3b max-width: 200px%3b text-align: center%3b'%3e%3cspan class='nodeLabel'%3e%3cp%3esnagrecover%3c/p%3e%3c/span%3e%3c/div%3e%3c/foreignObject%3e%3c/g%3e%3c/g%3e%3cg class='node default' id='mermaid-1-flowchart-programmer-2' data-look='classic' transform='translate(366.296875%2c 291)'%3e%3crect class='basic label-container' style='' x='-101.578125' y='-27' width='203.15625' height='54'/%3e%3cg class='label' style='' transform='translate(-71.578125%2c -12)'%3e%3crect/%3e%3cforeignObject width='143.15625' height='24'%3e%3cdiv xmlns='http://www.w3.org/1999/xhtml' style='display: table-cell%3b white-space: nowrap%3b line-height: 1.5%3b max-width: 200px%3b text-align: center%3b'%3e%3cspan class='nodeLabel'%3e%3cp%3eSTM32 programmer%3c/p%3e%3c/span%3e%3c/div%3e%3c/foreignObject%3e%3c/g%3e%3c/g%3e%3cg class='node default' id='mermaid-1-flowchart-boot1-3' data-look='classic' transform='translate(251.28125%2c 419)'%3e%3crect class='basic label-container' style='' x='-90.015625' y='-27' width='180.03125' height='54'/%3e%3cg class='label' style='' transform='translate(-60.015625%2c -12)'%3e%3crect/%3e%3cforeignObject width='120.03125' height='24'%3e%3cdiv xmlns='http://www.w3.org/1999/xhtml' style='display: table-cell%3b white-space: nowrap%3b line-height: 1.5%3b max-width: 200px%3b text-align: center%3b'%3e%3cspan class='nodeLabel'%3e%3cp%3eMMC boot1 DFU%3c/p%3e%3c/span%3e%3c/div%3e%3c/foreignObject%3e%3c/g%3e%3c/g%3e%3cg class='node default' id='mermaid-1-flowchart-boot2-4' data-look='classic' transform='translate(481.3125%2c 419)'%3e%3crect class='basic label-container' style='' x='-90.015625' y='-27' width='180.03125' height='54'/%3e%3cg class='label' style='' transform='translate(-60.015625%2c -12)'%3e%3crect/%3e%3cforeignObject width='120.03125' height='24'%3e%3cdiv xmlns='http://www.w3.org/1999/xhtml' style='display: table-cell%3b white-space: nowrap%3b line-height: 1.5%3b max-width: 200px%3b text-align: center%3b'%3e%3cspan class='nodeLabel'%3e%3cp%3eMMC boot2 DFU%3c/p%3e%3c/span%3e%3c/div%3e%3c/foreignObject%3e%3c/g%3e%3c/g%3e%3cg class='node default' id='mermaid-1-flowchart-U-Boot-9' data-look='classic' transform='translate(251.28125%2c 547)'%3e%3crect class='basic label-container' style='' x='-54.8984375' y='-27' width='109.796875' height='54'/%3e%3cg class='label' style='' transform='translate(-24.8984375%2c -12)'%3e%3crect/%3e%3cforeignObject width='49.796875' height='24'%3e%3cdiv xmlns='http://www.w3.org/1999/xhtml' style='display: table-cell%3b white-space: nowrap%3b line-height: 1.5%3b max-width: 200px%3b text-align: center%3b'%3e%3cspan class='nodeLabel'%3e%3cp%3eU-Boot%3c/p%3e%3c/span%3e%3c/div%3e%3c/foreignObject%3e%3c/g%3e%3c/g%3e%3cg class='node default' id='mermaid-1-flowchart-UART-10' data-look='classic' transform='translate(59.6328125%2c 419)'%3e%3crect class='basic label-container' style='' x='-51.6328125' y='-27' width='103.265625' height='54'/%3e%3cg class='label' style='' transform='translate(-21.6328125%2c -12)'%3e%3crect/%3e%3cforeignObject width='43.265625' height='24'%3e%3cdiv xmlns='http://www.w3.org/1999/xhtml' style='display: table-cell%3b white-space: nowrap%3b line-height: 1.5%3b max-width: 200px%3b text-align: center%3b'%3e%3cspan class='nodeLabel'%3e%3cp%3eUART%3c/p%3e%3c/span%3e%3c/div%3e%3c/foreignObject%3e%3c/g%3e%3c/g%3e%3cg class='node default' id='mermaid-1-flowchart-sdx-17' data-look='classic' transform='translate(251.28125%2c 675)'%3e%3crect class='basic label-container' style='' x='-59.796875' y='-27' width='119.59375' height='54'/%3e%3cg class='label' style='' transform='translate(-29.796875%2c -12)'%3e%3crect/%3e%3cforeignObject width='59.59375' height='24'%3e%3cdiv xmlns='http://www.w3.org/1999/xhtml' style='display: table-cell%3b white-space: nowrap%3b line-height: 1.5%3b max-width: 200px%3b text-align: center%3b'%3e%3cspan class='nodeLabel'%3e%3cp%3e/dev/sdx%3c/p%3e%3c/span%3e%3c/div%3e%3c/foreignObject%3e%3c/g%3e%3c/g%3e%3cg class='node default' id='mermaid-1-flowchart-eMMC-18' data-look='classic' transform='translate(251.28125%2c 803)'%3e%3crect class='basic label-container' style='' x='-89.578125' y='-27' width='179.15625' height='54'/%3e%3cg class='label' style='' transform='translate(-59.578125%2c -12)'%3e%3crect/%3e%3cforeignObject width='119.15625' height='24'%3e%3cdiv xmlns='http://www.w3.org/1999/xhtml' style='display: table-cell%3b white-space: nowrap%3b line-height: 1.5%3b max-width: 200px%3b text-align: center%3b'%3e%3cspan class='nodeLabel'%3e%3cp%3eeMMC user area%3c/p%3e%3c/span%3e%3c/div%3e%3c/foreignObject%3e%3c/g%3e%3c/g%3e%3c/g%3e%3c/g%3e%3c/g%3e%3cdefs%3e%3cfilter id='mermaid-1-drop-shadow' height='130%25' width='130%25'%3e%3cfeDropShadow dx='4' dy='4' stdDeviation='0' flood-opacity='0.06' flood-color='black'/%3e%3c/filter%3e%3c/defs%3e%3cdefs%3e%3cfilter id='mermaid-1-drop-shadow-small' height='150%25' width='150%25'%3e%3cfeDropShadow dx='2' dy='2' stdDeviation='0' flood-opacity='0.06' flood-color='black'/%3e%3c/filter%3e%3c/defs%3e%3c/svg%3e)
Did it make flashing any faster?
Using time with both methods provided the following results.
STM32CubeProgrammer:
real    3m26.188s
user    0m4.264s
sys     0m5.277s
The new flasher:
real    1m58.553s
user    0m6.557s
sys     0m0.690s
That takes the elapsed flashing time from 206.188 seconds to 118.553 seconds.
The difference is 87.635 seconds per board, or about a 42.5% reduction in elapsed time.
While I wouldn’t treat two time measurements as a detailed performance benchmark as USB topology, image contents, eMMC performance and host behaviour can all affect the result, ot does give a good indication of the improvement.
For the actual workflow I cared about, though, dropping from around three and a half minutes to just under two minutes is useful. This becomes more significant when the same operation is being repeated during development or across multiple units in manufacturing.
Related posts
Browse all posts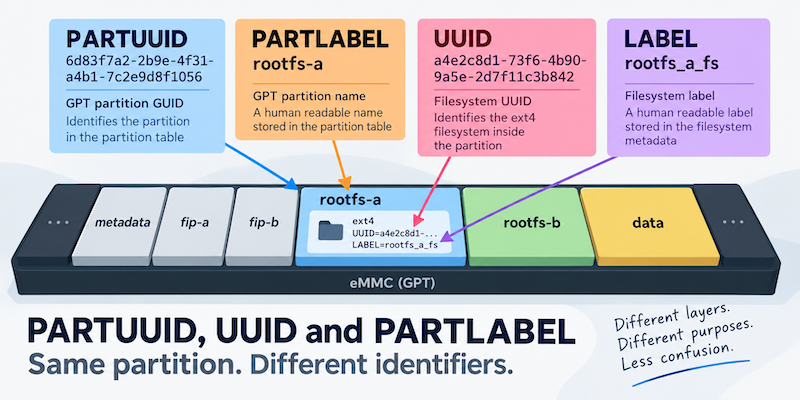
TALES FROM THE TRENCHES · #5
PARTUUID, UUID and PARTLABEL: When a Partition Has Too Many Names
Converting a system to A/B root filesystems and changing UUIDs
TALES FROM THE TRENCHES · #4
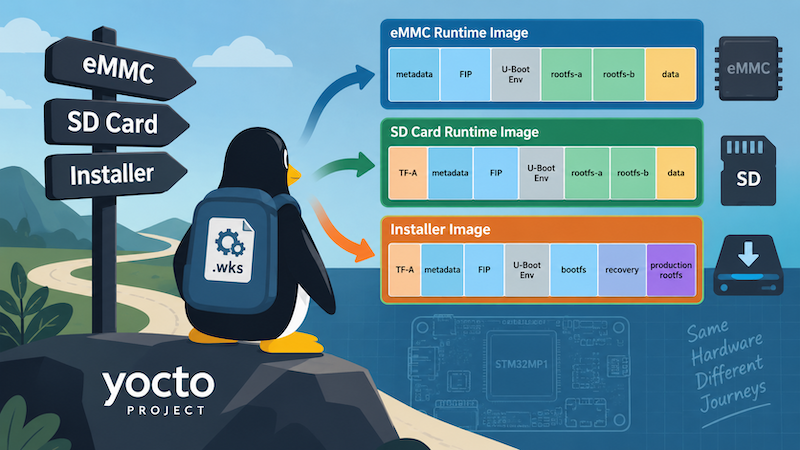
One Yocto Machine, Several WIC Layouts
Selecting different Yocto WIC partition layouts by image purpose and deployment target, while keeping a sensible machine-level default
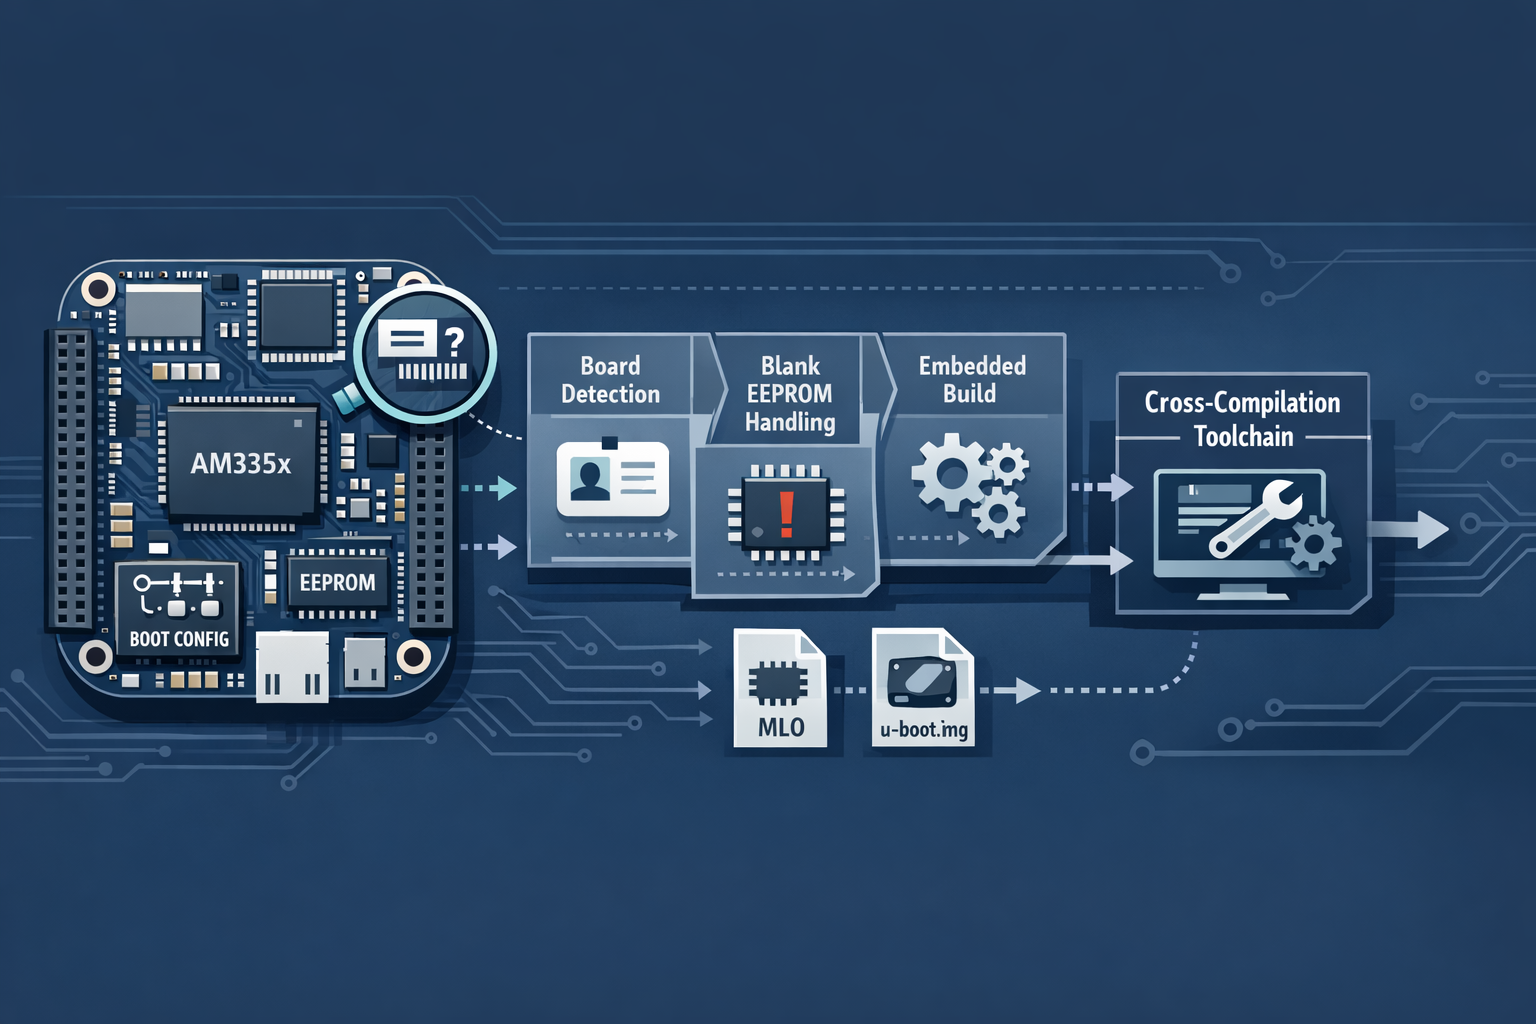
Compiling U-Boot for the BeagleBone Black and OSD335x
How to build a custom U-Boot for BeagleBone Black and Octavo Systems OSD335x designs